

Views: 101
Event Boundaries
Event breaking in Splunk refers to breaking raw data into individual events based on specified boundaries. Splunk uses event-breaking rules to identify where one event ends, and the next begins.
In the PART I of this series, we have created a TestApp which is placed at /opt/splunk/etc/apps/TestApp/. Please follow this link to read the PART I article.
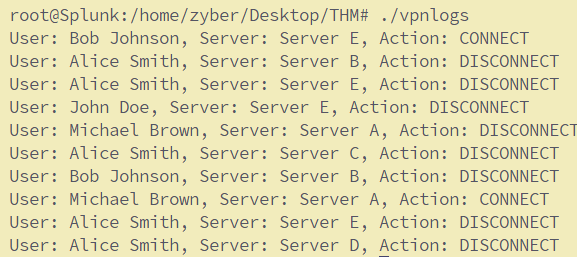
Now we need to generate some events to feed data into Splunk. For this, I will be using a python script called “vpnlogs” which generates the below logs when executed.
Now let’s configure Splunk to ingest these VPN logs. Copy the vpnlogs script into the bin directory, open the inputs.conf , and write these lines:

Then edit the inputs.conf file of the TestApp to include the following lines.
[script:///opt/splunk/etc/apps/TestApp/bin/vpnlogs]
index = main
source = vpn
sourcetype = vpn_logs
interval = 5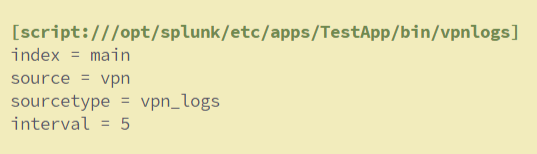
Restart Splunk
Save the file and restart Splunk using the command /opt/splunk/bin/splunk restart or systemctl restart splunk.
Search Head
Select the time range and use the following search query to see if we are getting the logs.
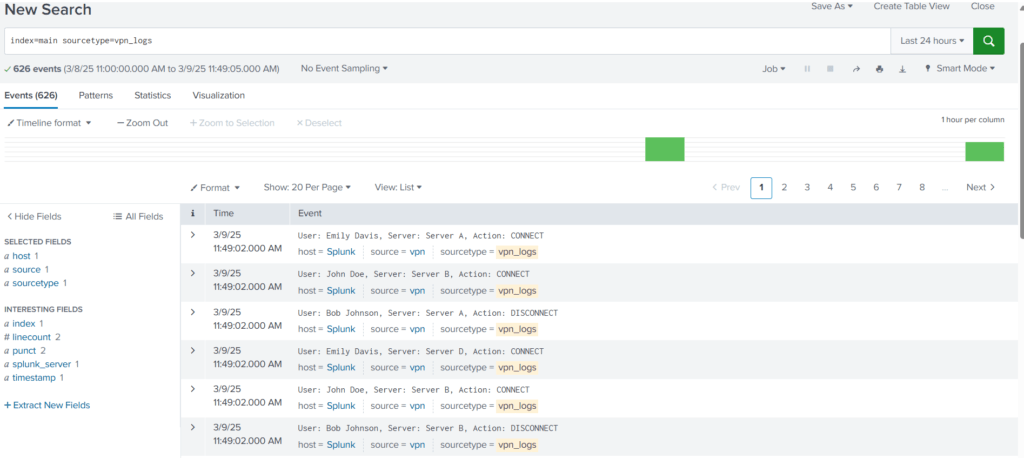
Search Query: index=main sourcetype=vpn_logs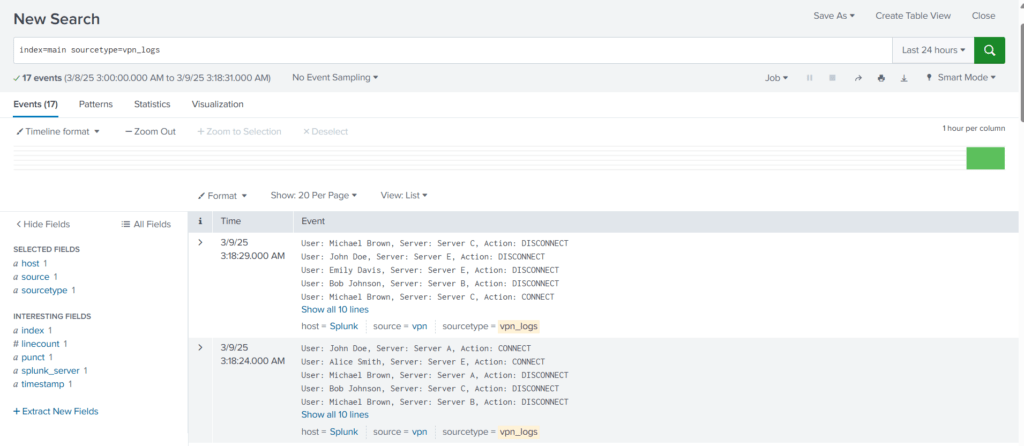
We are getting the VPN logs after every 5 seconds. But the problem is evident that Splunk cannot determine the boundaries of each event and considers multiple events as a single event. By default, Splunk breaks the event after carriage return.
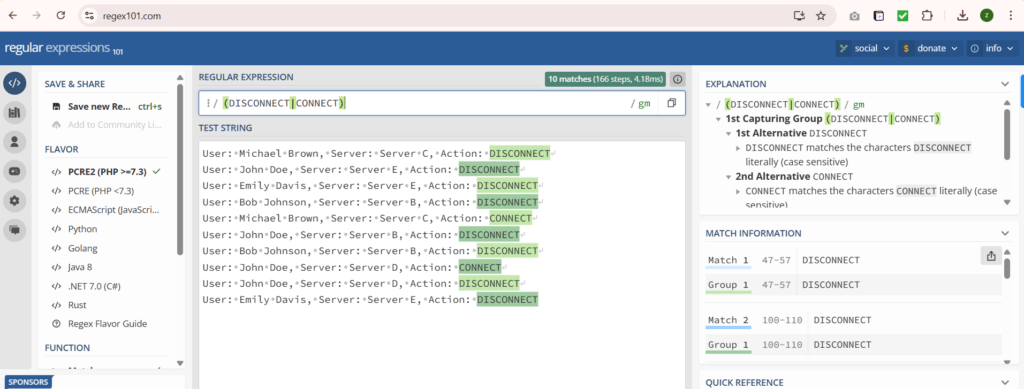
To configure Splunk to break the events in this case, we have to make some changes to the props.conf file. First, we will create a regex to determine the end of the event. The sample events are shown below:

We will use reg101.com to create a regex pattern. If we look closely, all events end with the terms DISCONNECT or CONNECT. We can use this information to create a regex pattern (DISCONNECT|CONNECT) , as shown below:
Now, let’s create a props.conf in the default directory within the TestApp and add the following lines:
[vpn_logs]
SHOULD_LINEMERGE = true
MUST_BREAK_AFTER = (DISCONNECT|CONNECT)
SHOULD_LINEMERGE, this stanza value “true”
MUST_BREAK_AFTER, this stanza is used in the configuration to force Splunk to break the event after the specified pattern.
This configuration tells Splunk to take the sourcetype to merge all lines and it must break the events when you see the pattern matched in the mentioned regex.
Restart Splunk
Save the file and restart Splunk using the command /opt/splunk/bin/splunk restart or systemctl restart splunk.
Now Splunk is able to break the event exactly as how we intended to see it.
Parsing Muilt-line Events
Different log sources have their own ways of generating logs. Some log source generates event logs that comprise of multi-lines. One such example is Windows Event logs.
To demonstrate this, I will be using a python script called “authentication_logs” which generates the below logs when executed.

Now let’s configure Splunk to ingest these logs. Copy the python script into the bin directory.

Open the inputs.conf and add the following lines in inputs.conf, save the file, and restart Splunk:
[script:///opt/splunk/etc/apps/TestApp/bin/authentication_logs]
interval = 5
index = main
sourcetype= auth_logs
host = auth_server
Restart Splunk
Save the file and restart Splunk using the command /opt/splunk/bin/splunk restart or systemctl restart splunk.
Search Head
Let’s look at the Splunk Search head to see how these logs are injested into Splunk.
Search Query: index=main sourcetype = auth_logs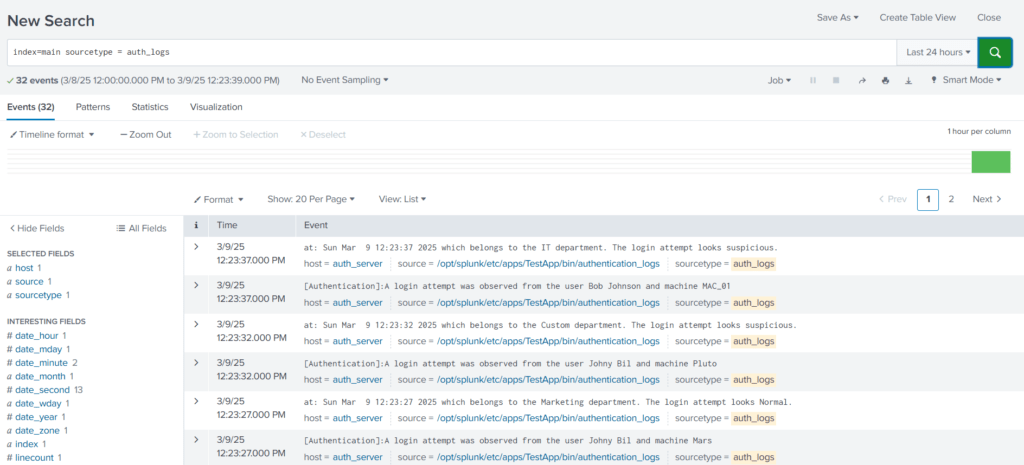
From the results, we can see that Splunk is breaking the 2-line Event into 2 different events and is unable to determine the boundaries.
Fixing the Event Boundary
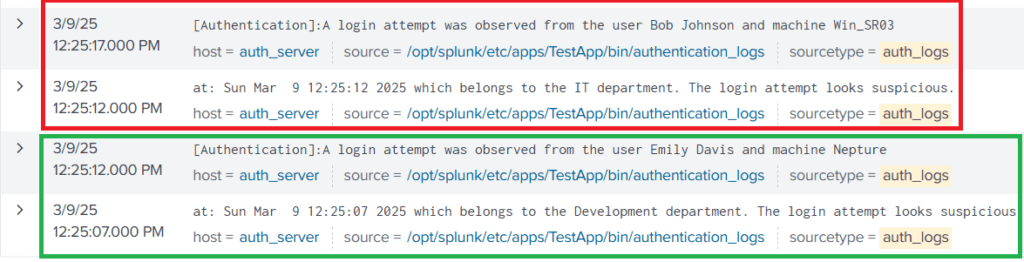
In order to fix this issue, Let’s use different stanzas in the props.conf file. We can see that each event starts with the term [Authentication], indicating the start of the event. We can use this as the regex pattern with the stanza BREAK_ONLY_BEFORE and see if it could fix this problem. Copy the following lines in props.conf file, save the file, and then restart Splunk to apply changes.
[auth_logs]
SHOULD_LINEMERGE = true
BREAK_ONLY_BEFORE = \[Authentication\]
Save the file and restart Splunk using the command /opt/splunk/bin/splunk restart or systemctl restart splunk.
Let’s repeat the search again using the query index=main sourcetype = auth_logs
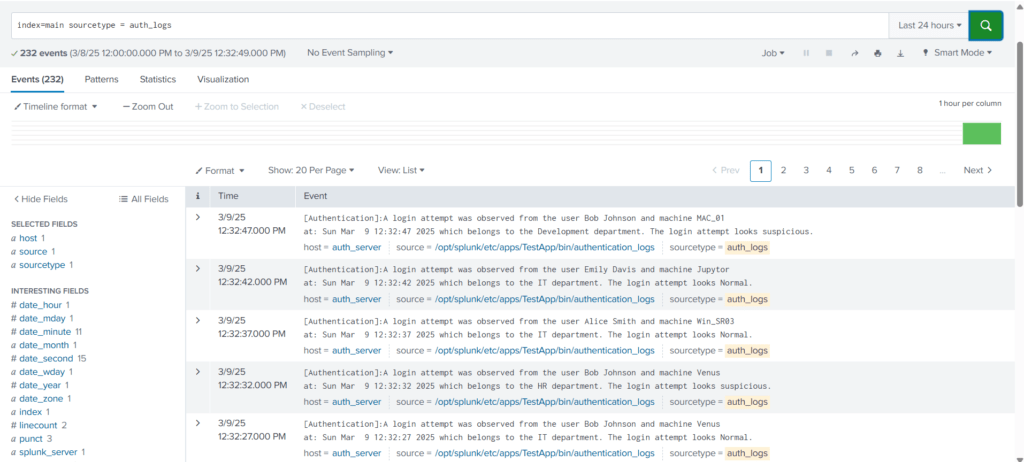
Now Splunk is able to break the event exactly how it was intended.
Masking Sensitive Data
Masking sensitive fields, such as credit card numbers, is essential for maintaining compliance with standards like PCI DSS (Payment Card Industry Data Security Standard) and HIPAA (Health Insurance Portability and Accountability Act). Splunk provides features like field masking and anonymization to protect sensitive data.
To demonstrate this, I will be using a python script called “purchase-details” which generates the below logs when executed. This script need to be placed under the bin directory of the TestApp folder.


Open the inputs.conf and add the following lines in inputs.conf, save the file, and restart Splunk:
[script:///opt/splunk/etc/apps/TestApp/bin/purchase-details]
interval = 5
index = main
source = purchase_logs
sourcetype= purchase_logs
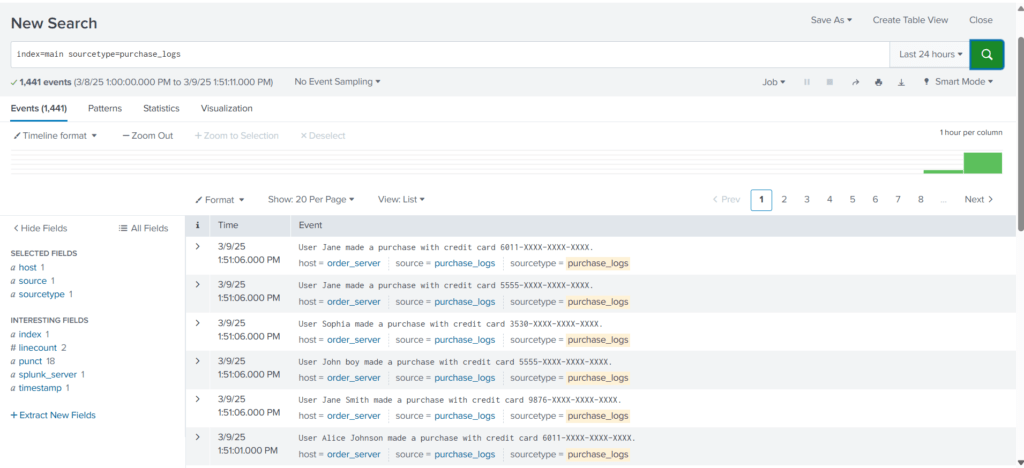
host = order_serverAfter the restart, let’s run the below search query from Search Head,
index=main sourcetype=purchase_logs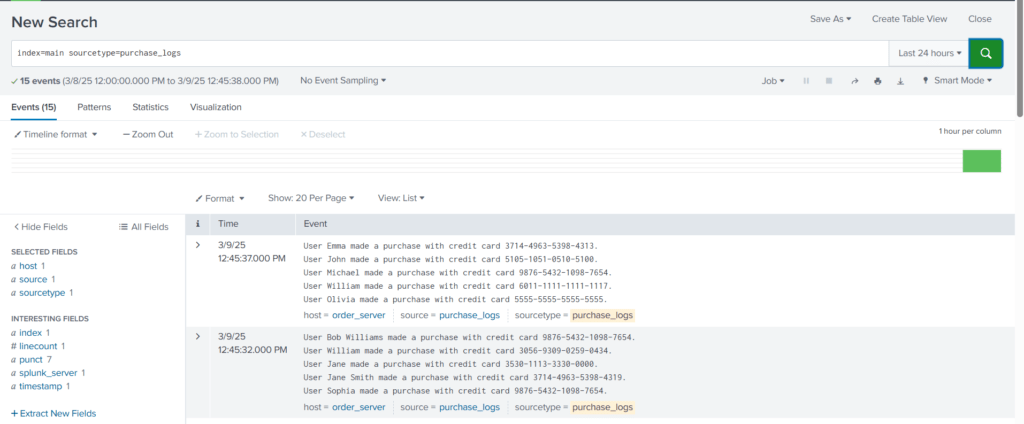
From the results, it appears that we have two tasks to complete. We need to hide the credit card information that is being added to each event and also need to fix the event boundaries.
Fixing Event Boundaries
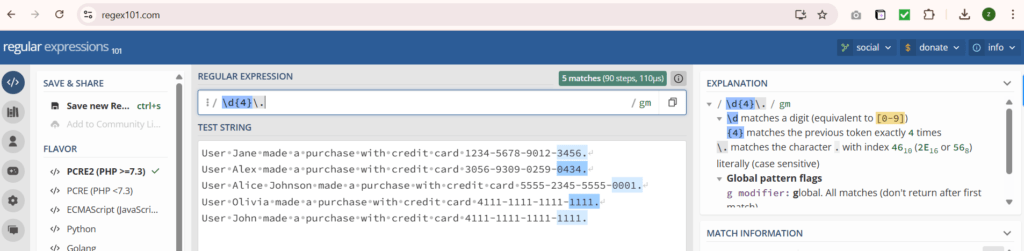
Let us create a regex pattern to identify the end boundary of each event, as shown below:
Let’s update the props.conf of the TestApp, as shown below:
[purchase_logs]
SHOULD_LINEMERGE = true
MUST_BREAK_AFTER = \d{4}\.]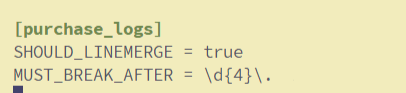
Save the file, and restart Splunk. Let’s run the search query again.
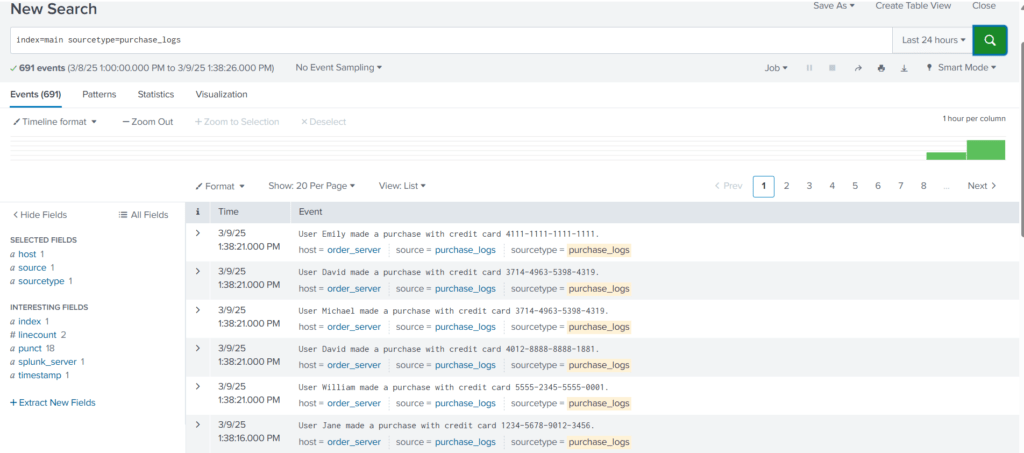
Now that we have fixed the event boundary issue. It’s time to mask the sensitive information from the events.
SEDCMD
In Splunk, the sedcmd configuration setting is used in the props.conf file to modify or transform data during indexing. It allows us to apply regular expression-based substitutions on the incoming data before indexing it. The sedcmd setting uses the syntax and functionality of the Unix sed command.
Here’s a brief explanation of how the sedcmd works in props.conf:
- Open the
props.conffile in your Splunk configuration directory. - Locate or create a stanza for the data source you want to modify.
- Add the
sedcmdsetting under the stanza. - Specify the regular expression pattern and the replacement string using the
s/syntax similar to thesedcommand.
[source::/path/to/your/data]
SEDCMD-myField = s/oldValue/newValue/g
In this example, the sedcmd setting is applied to the data from a specific source path. It uses the regular expression pattern oldValue and replaces it globally with newValue using the g flag in the myField field. This transformation occurs before Splunk indexes the data.
It is important to note that, this sedcmd is just one of the configuration settings props.conf used for data transformation. There are other options available, such as REGEX, TRANSFORMS, etc.
Masking Credit Card Information
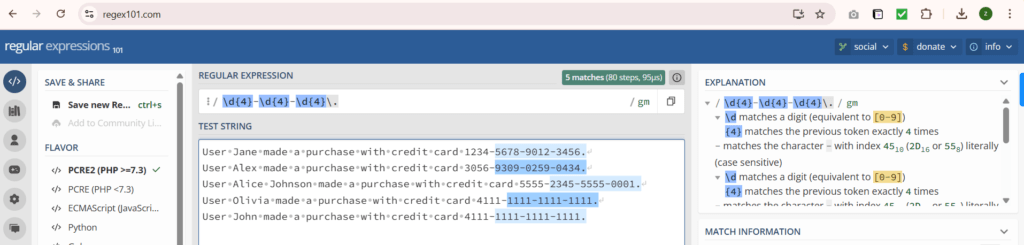
Let’s use this s/OLD_VALUE>/<NEW_VALUE>/g regex in sedcmd to replace the credit card numbers with XXXX-XXXX-XXXX. The final sedcmd value will become s/-\d{4}-\d{4}-\d{4}/-XXXX-XXXX-XXXX/g
Modify the props.conf file as shown below,
[purchase_logs]
SHOULD_LINEMERGE = true
MUST_BREAK_AFTER = \d{4}\.
SEDCMD-cc = s/-\d{4}-\d{4}-\d{4}/-XXXX-XXXX-XXXX/g
Save the file, and restart Splunk. Let’s run the search query again.
Now, we are able to mask the sensitive information. Masking sensitive information before being logged in order to comply with standards like HIPAA, PCI-DSS, etc.
Extracting Custom Fields
We would often encounter logs either custom log sources, where not all fields are extracted by the SIEM automatically, or we are required to extract custom fields to improve the analysis.
In that case, we need a way to extract custom fields from the logs. To demonstrate this , let’s use the vpn_logs case.
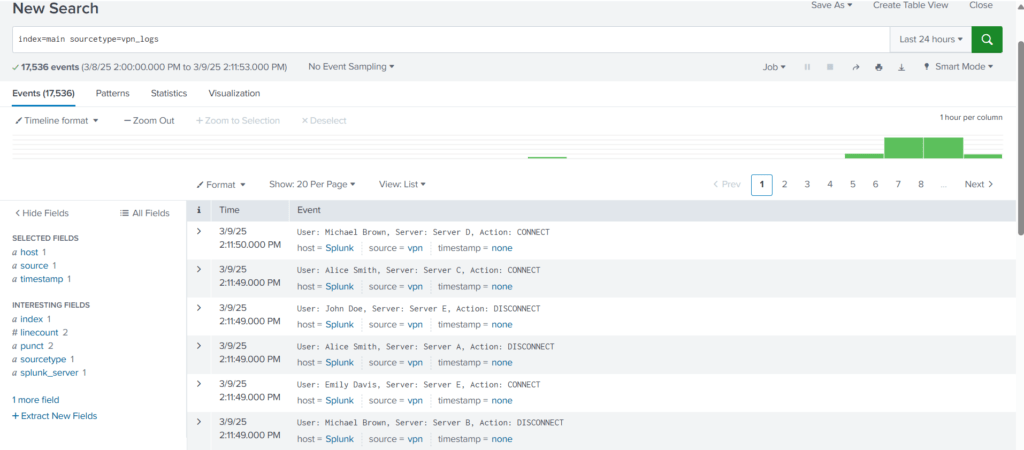
Let’s run the search query: index=main sourcetype="vpn_logs"
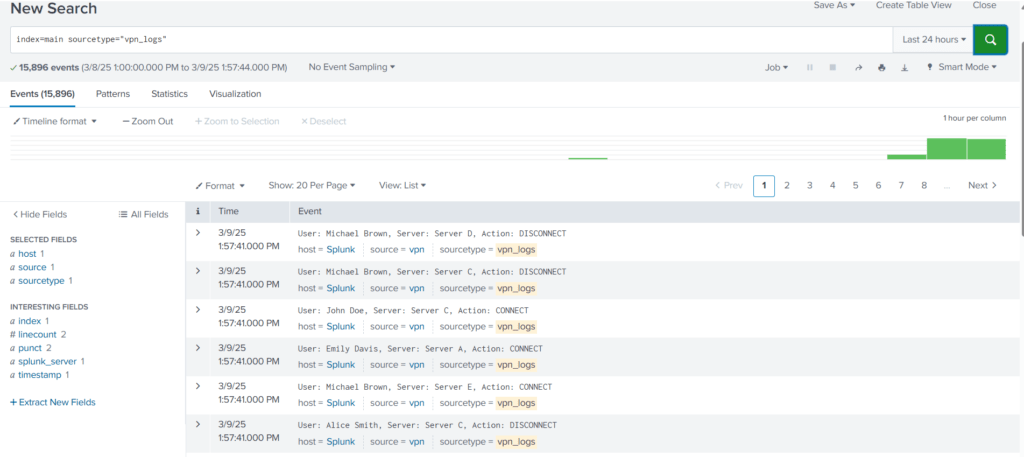
It’s clear that none of the fields are extracted automatically, and we can not perform any analysis on these events until fields like username, server, and action are extracted.
Extracting Username
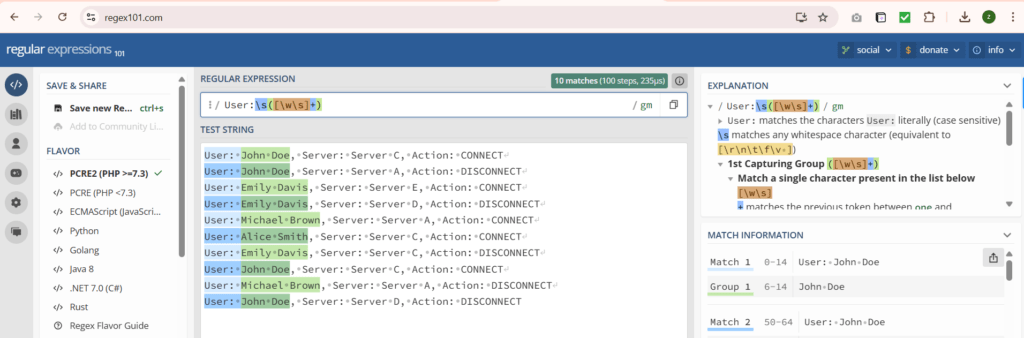
Creating Regex Pattern
User: John Doe, Server: Server C, Action: CONNECT
User: John Doe, Server: Server A, Action: DISCONNECT
User: Emily Davis, Server: Server E, Action: CONNECT
User: Emily Davis, Server: Server D, Action: DISCONNECT
User: Michael Brown, Server: Server A, Action: CONNECT
User: Alice Smith, Server: Server C, Action: CONNECT
User: Emily Davis, Server: Server C, Action: DISCONNECT
User: John Doe, Server: Server C, Action: CONNECT
User: Michael Brown, Server: Server A, Action: DISCONNECT
User: John Doe, Server: Server D, Action: DISCONNECT
By creating a regex pattern as: User:\s([\w\s]+) and creating a capturing group, we have successfully captured all the usernames that we want to extract.
Creating and Updating transforms.conf
Now, let’s create a transforms.conf in the default folder of the TestApp directory, and put the following configurations in it as it is.
[vpn_custom_fields]
REGEX = User:\s([\w\s]+)
FORMAT = Username::$1
WRITE_META = true
We have created a custom identifier vpn_custom_fields, used the regex pattern to pull the usernames from the logs, mentioned the field name as Username, and asked to capture the first group by referring to it as $1. Save the configuration and move to the next step.
Updating props.conf
We need to update the props.conf to mention the recent updates we did in transforms.conf. Here, we are appending the configuration for sourcetype vpn_logs with the line TRANSFORM-vpn = vpn_custom_fields, as shown below:
[vpn_logs]
SHOULD_LINEMERGE = true
MUST_BREAK_AFTER = (DISCONNECT|CONNECT)
TRANSFORM-vpn = vpn_custom_fields
Creating and Updating fields.conf
The next step would be to create fields.conf and mention the field we are going to extract from the logs, which is Username. INDEXED = true means we are telling Splunk to extract this field at the indexed time.
[Username]
INDEXED = true
Restart Splunk and run the search query again, after the Splunk restart.
index=main sourcetype=vpn_logs
Expand the log and select the Username field.
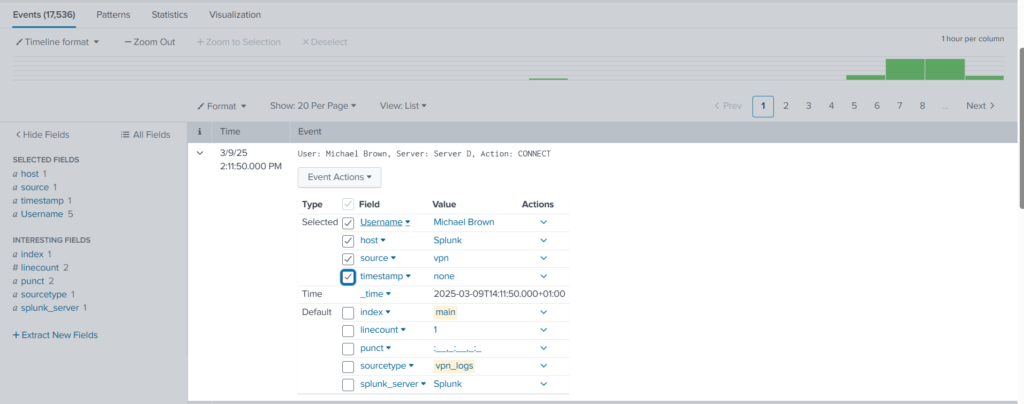
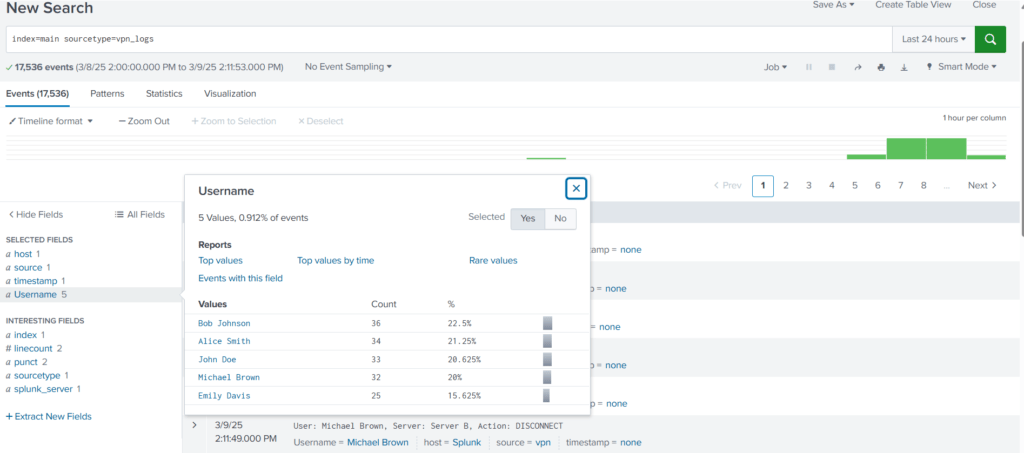
With these changes to the configuration files, now we are able to extract a custom field from the logs.
Let’s use the same process and extract the remaining two fields as well.
Creating Regex Pattern
This regex pattern User:\s([\w\s]+),.+(Server.+),.+:\s(\w+) captures all the three fields and places them into the groups, as shown below:

Updating transforms.conf
Now that we have captured the fields that we want to extract, let’s update the transforms.conf file, as shown below:
[vpn_custom_fields]
REGEX = User:\s([\w\s]+),.+(Server.+),.+:\s(\w+)
FORMAT = Username::$1 Server::$2 Action::$3
WRITE_META = true
Updating fields.conf
Now it’s time to update the fields.conf with the field names that we want Splunk to extract at index time.

Save the file and restart Splunk.
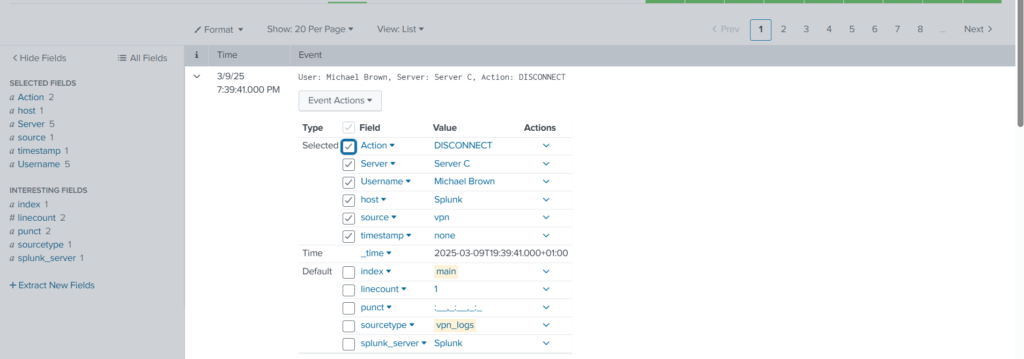
Additonal fields ‘Server’ and ‘Action’ are available now.
The End.
References
- https://docs.splunk.com/Splexicon:Stanza
- https://docs.splunk.com/Documentation/Splunk/9.1.1/Admin/Listofconfigurationfiles
- https://docs.splunk.com/Documentation/SplunkCloud/9.0.2305/Data/Configureeventlinebreaking
- https://www.splunk.com/en_us/blog/learn/it-event-correlation.html

