
Views: 340
What is SimpleRisk CORE (Community Edition)?
SimpleRisk CORE (Community Edition) is an open-source Governance, Risk, and Compliance (GRC) tool designed to help organizations identify, assess, and manage risks effectively. It provides a structured framework for risk tracking, mitigation planning, and reporting, making it an excellent choice for small to medium businesses, startups, and cybersecurity professionals looking to implement a risk management process without high costs.
Key Features of SimpleRisk Community Edition:
- Risk Management – Submit, track, and assess risks based on likelihood and impact.
- Risk Reporting – Generate detailed reports for compliance and auditing.
- Mitigation Planning – Define and manage risk treatment strategies.
- Custom Categories & Scoring – Customize risk categories and scoring models.
- User-Friendly Interface – Simple web-based UI for easy access and management.
Unlike the Enterprise Edition, which offers advanced features like integrations, automated workflows, and third-party risk management, the Community Edition is completely free and can be self-hosted, making it ideal for organizations wanting to start with risk management without financial commitments.
Comparison: SimpleRisk Community Edition vs. Enterprise Edition
SimpleRisk offers two main editions: Community Edition (free and open-source) and Enterprise Edition (paid with advanced features). Below is a detailed comparison to help you decide which version fits your organization’s needs.
| Feature | Community Edition | Enterprise Edition |
|---|
| Cost | Free (Open-Source) | Paid (Subscription-Based) |
| Self-Hosted | ✅ Yes | ✅ Yes |
| Risk Management | ✅ Basic Risk Submission & Tracking | ✅ Advanced Risk Assessment with Workflow Automation |
| Risk Reporting | ✅ Basic Reports | ✅ Custom Reports & Dashboards |
| Mitigation Plans | ✅ Manual Tracking | ✅ Automated Tracking & Notifications |
| Compliance Frameworks | ❌ No Built-in Support | ✅ Supports ISO 27001, NIST, GDPR, HIPAA, etc. |
| Integrations | ❌ None | ✅ SIEM, ITSM, Vulnerability Scanners, and more |
| User Management | ✅ Basic (Single Admin) | ✅ Role-Based Access Control (RBAC) |
| Incident & Audit Management | ❌ No | ✅ Yes |
| Multi-Tenancy Support | ❌ No | ✅ Yes |
| Vendor Risk Management | ❌ No | ✅ Yes |
| Automated Notifications | ❌ No | ✅ Yes |
| API Access | ❌ No | ✅ Yes |
SimpleRisk Community Edition is ideal for small teams, security professionals, and organizations that want a free, self-hosted solution for basic risk management.
SimpleRisk Enterprise Edition is designed for businesses that need advanced GRC capabilities, compliance frameworks, integrations, and automation.
How to Install SimpleRisk Community Edition Using VM
SimpleRisk is an open-source risk management tool designed to help organizations identify, assess, and mitigate risks efficiently. In this guide, we will explore various installation options and provide a step-by-step method to install SimpleRisk Community Edition using a prebuilt virtual machine (VM) in VMware Workstation.
1. Installation Options for SimpleRisk Community Edition
There are several ways to install SimpleRisk:
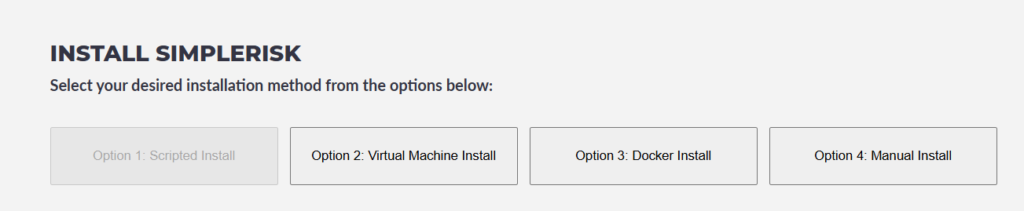
A. Virtual Machine (Prebuilt VM) – Recommended for LABs
- Download and import a pre-configured SimpleRisk VM.
- Easiest and quickest setup method.
- Runs on a minimal Ubuntu server with all dependencies pre-installed.
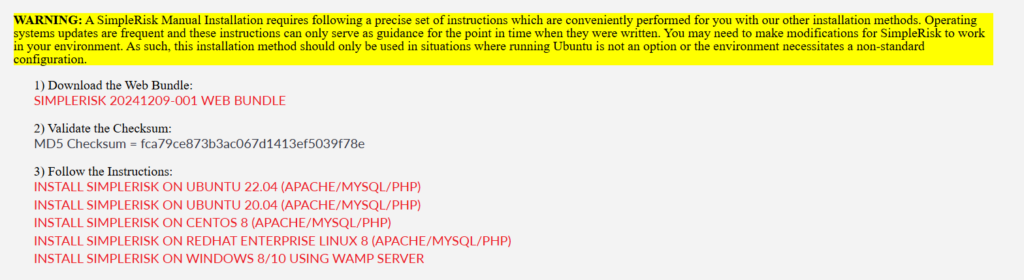
B. Manual Installation on a Linux Server
- Install Ubuntu, Debian, or CentOS manually.
- Install necessary dependencies like Apache, MySQL/MariaDB, and PHP.
- Download and configure SimpleRisk manually.

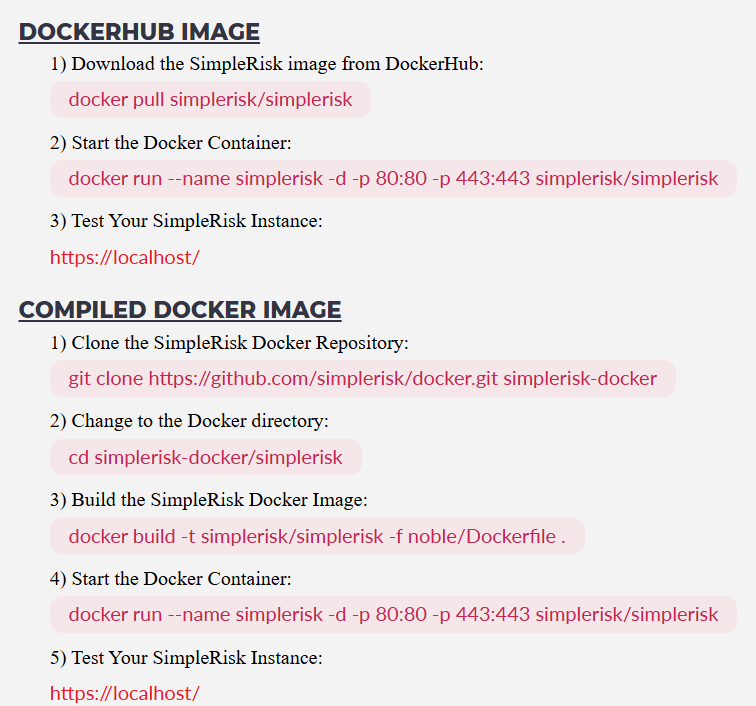
C. Docker Deployment
- Run SimpleRisk using a prebuilt Docker container.
- Requires Docker and Docker Compose setup.
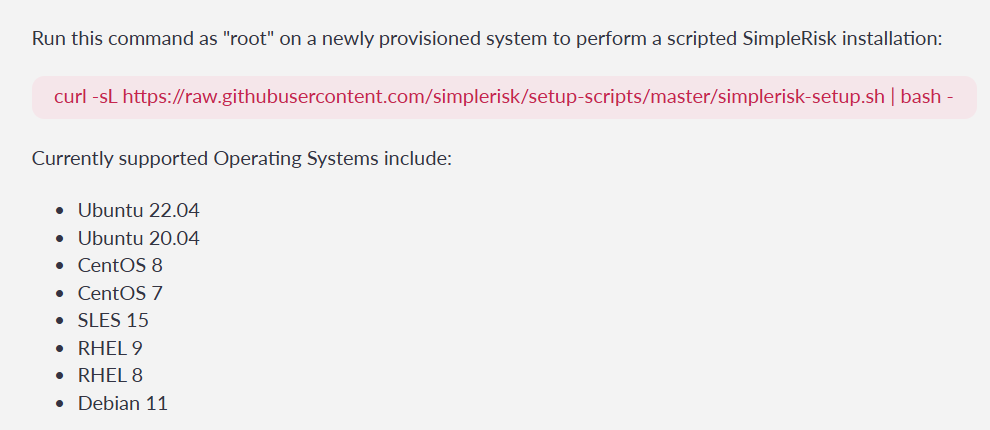
D. Scripted Installation
- Install SimpleRisk on local systems or cloud platforms like AWS, Azure, or GCP.
2. Installation Steps Using the Virtual Machine (VM) Option
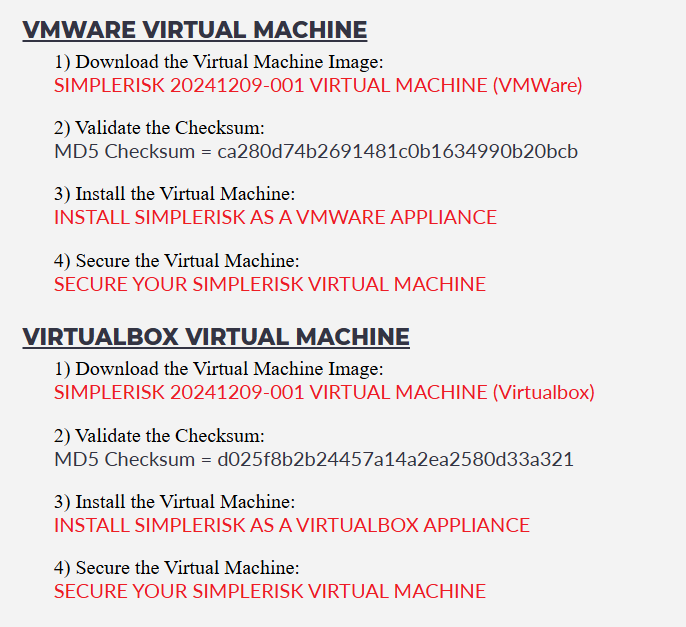
Step 1: Download the Prebuilt SimpleRisk VM
- Visit the official SimpleRisk website: https://www.simplerisk.com.
- Locate the Community Edition and download the OVA file (pre-configured virtual appliance).
- Save the OVA file to your local system.
Download the VM in your preferred format, VMware or VirtualBox.
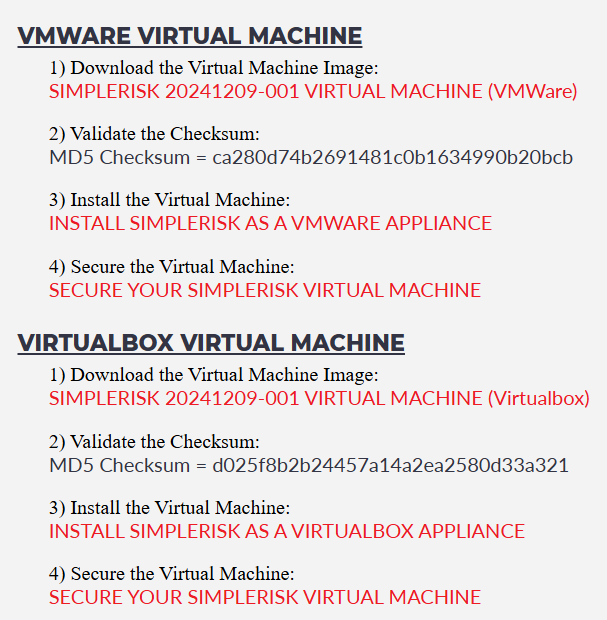
I have used the VMware version of the VM for this DEMO and the following steps are adapted for importing the VM into VMware Workstation.
Step 2: Import the VM into VMware Workstation
- Open VMware Workstation.
- Click File > Open and select the downloaded SimpleRisk OVA file.
- Follow the wizard prompts:
- Change the VM name if needed.
- Select a storage location.
- Click Import.
Step 3: Adjust VM Settings (Optional)
- Memory: Increase to at least 2GB.
- Processors: Set to 2 vCPUs.
- Network: Set to Bridged Mode or NAT for internet access.
Step 4: Start the VM
- Select the imported SimpleRisk VM in VMware Workstation.
- Click Power On.
- Wait for the VM to boot into Linux.
Step 5: Login into the VM and Obtain the SimpleRisk Web Interface URL
- Log into the VM using default credentials (provided by SimpleRisk).
- Run the command:
ip a- Note the IP address assigned to the VM.
- Example output:
192.168.1.100.
Username  :  simplerisk
Password  :  simplerisk
Step 6: Access the SimpleRisk Web UI
- Open a web browser on your host machine.
- Enter the VM’s IP address:
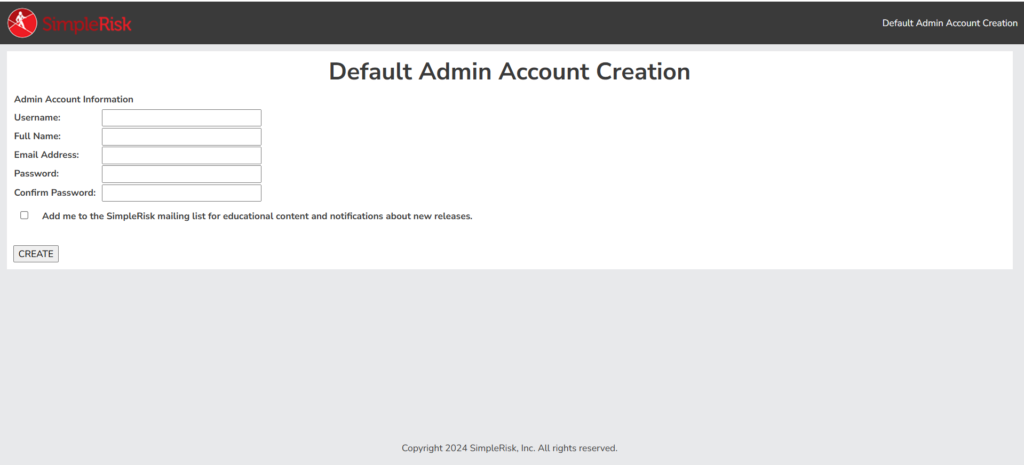
http://192.168.1.100 - The SimpleRisk Default Admin Account Creation page should appear.
3. Initial Configuration After Installation
Step 1: Set Up Administrator Account
- On the first login, create an admin user.
- Use a strong password.
Create an account with information relevant to your organosation/home LAB.

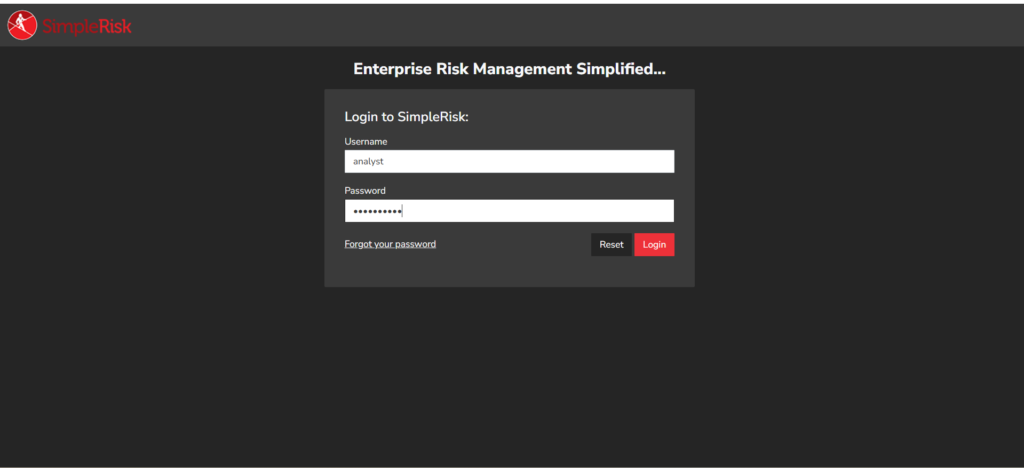
Step 2: Login for the first time using the newly created credentials
- If prompted, ensure the database is configured.
- If using a prebuilt VM, this step is usually pre-configured.
Step 3: (Optional) Register your instance
- This step is optional.
- Benefits of registering the instance as per the information available from SimpleRisk is,
Registered SimpleRisk instances are immediately granted access to the Upgrade and Secure Controls Framework (SCF) Extras. The Upgrade Extra provides the ability to back up and upgrade your SimpleRisk instance with the click of a button. The Secure Controls Framework (SCF) Extra provides a common control framework that is integrated into the SimpleRisk Governance functionality. 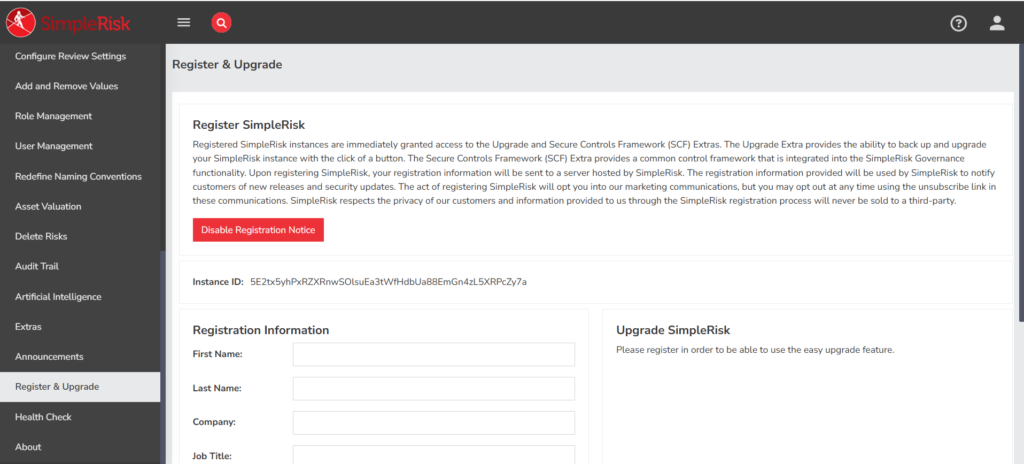
Step 3: (Optional) Register the Instance
- Provide the required Information and a valid email address in the “Registration Information” form.
- You will receive a “Please Confirm Yourself” email with link to confirm your email address. Use the link to confirm your rmail address.
Registration Success.
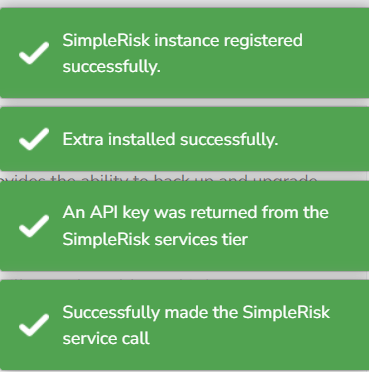
Secure Controls Framework (SCF) and easy Upgrade options are available now.
Reference to the Secure Controls Framework (SCF)
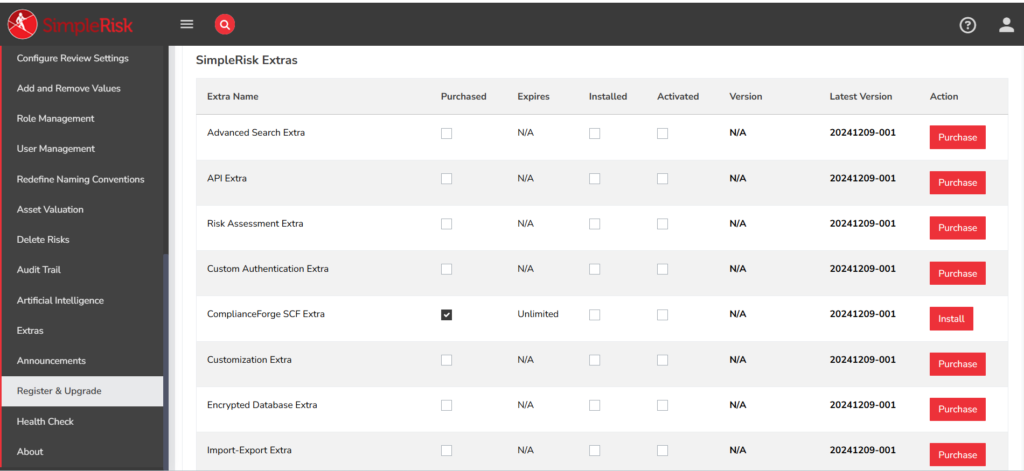
Install and activate the SCF option.


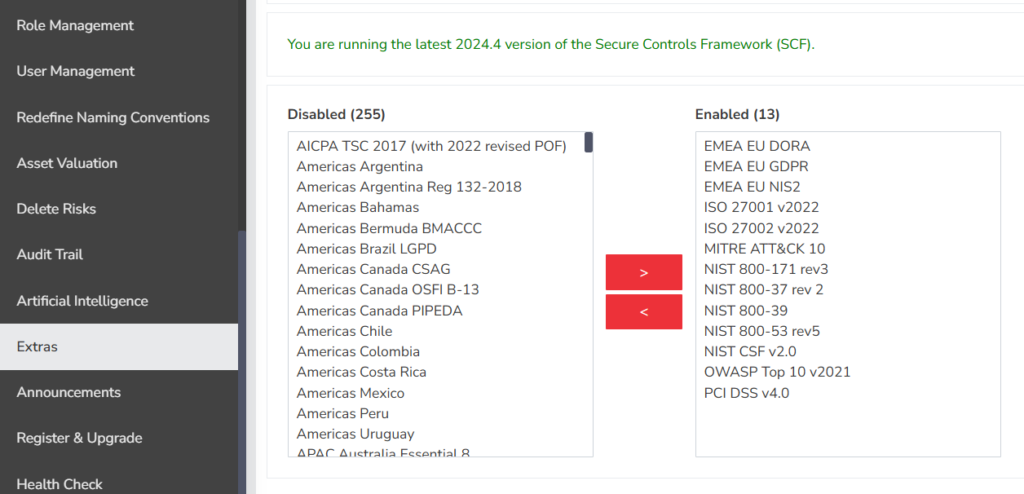
Once activated, enable the relevant frameworks to use.
Step 5: Test the Setup
- Navigate through the SimpleRisk dashboard.
- Try adding test risks to validate functionality.
Final Thoughts
Using the prebuilt VM is the easiest way to set up SimpleRisk in a VMware Workstation lab. It saves time and ensures all dependencies are correctly configured. After installation, configuring users and setting up system preferences is essential for effective risk management.