Views: 393
Disclaimer:
This post is created solely for educational and research purposes. The techniques, tools, and concepts discussed are intended to enhance cybersecurity awareness and skills by demonstrating how offensive security testing works. Unauthorized access to computer systems is a criminal offense and subject to severe penalties. Always practice these techniques in a controlled lab environment or with explicit permission from the system owner.
Mythic C2 – Command and Control Framework
A cross-platform, post-exploit, red teaming framework designed to provide a collaborative and user friendly interface for operators.
🔎 What is Mythic C2?
Mythic is a multiplayer Command and Control (C2) platform designed for red teaming operations. Its architecture is plug-and-play, allowing operators to quickly add new agents, communication channels, and custom modifications on the fly.
The main goals of the Mythic project are to:
- Provide quality-of-life improvements for operators
- Improve maintainability of agents
- Enable customization and extensibility
- Offer robust data analytics for red team operations
 ⚙️ How Mythic Works
Frontend: A web-based interface built with React
Backend: A collection of Docker containers
Core Server: Written in Go, handling most web requests via GraphQL APIs and WebSockets
Database:PostgreSQL for storing operational data
Messaging:RabbitMQ manages communication between containers
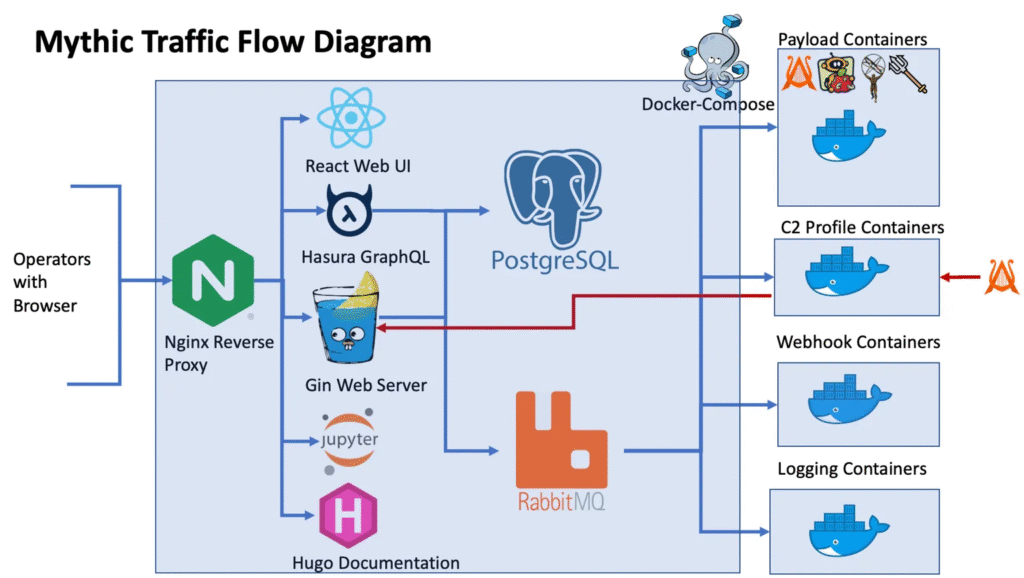
This modular design allows components to run either on the same system or be distributed across multiple physical machines or virtual environments, depending on your needs.
📌 Current State of C2 Profiles and Agents
A helpful overview of the currently available C2 Profiles and Agents for Mythic can be found here:
👉 Mythic Documentation – C2 Profiles and Agents
👉 Mythic C2 Profiles on GitHub
Installation
Installation Reference: https://docs.mythic-c2.net/installation
Clone the GitHub Repository:
└─$ git clone https://github.com/its-a-feature/Mythic --depth 1
Cloning into 'Mythic'...
remote: Enumerating objects: 1116, done.
remote: Counting objects: 100% (1116/1116), done.
remote: Compressing objects: 100% (924/924), done.
remote: Total 1116 (delta 270), reused 710 (delta 147), pack-reused 0 (from 0)
Receiving objects: 100% (1116/1116), 12.71 MiB | 17.80 MiB/s, done.
Resolving deltas: 100% (270/270), done.Requires docker and docker compose plugin. For Ubuntu, use ./install_docker_ubuntu.sh script. For Debian, use ./install_docker_debian.sh. For Kali, use ./install_docker_kali.sh.
Docker server version 20.10.22 or above required. On new Ubuntu/Debian systems, run sudo apt upgrade and sudo apt install docker-compose-plugin. Check version with sudo docker version.
Our base VM is a Kali Linux machine, so I run the Kali version of the script.
sudo ./install_docker_kali.shBuilding the mythic-cli
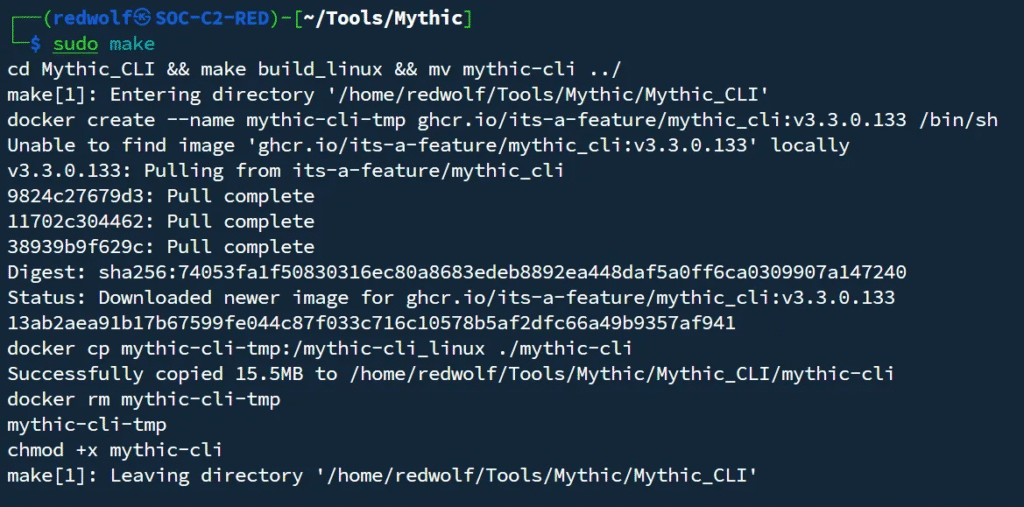
All configuration is managed through the mythic-cli binary. This binary is no longer included in the main Mythic repository to reduce GitHub storage requirements. You’ll need to build it yourself by running sudo make from the main Mythic folder. This command creates a build container, compiles the binary, and automatically copies it into your main Mythic folder. Once built, you can use the mythic-cli binary normally. Always ensure you’re using the mythic-cli binary from the main Mythic folder.
Prepare your installation
Mythic configuration is managed entirely through the Mythic/.env file. You can configure Mythic by either adding/editing values in this file or setting them in your environment.
The Mythic/.env file doesn’t exist by default. You have two options: let Mythic create it automatically when you first run sudo ./mythic-cli start, or create it beforehand with only the variables you want to configure. Running mythic-cli status is a simple way to pre-generate the .env file, allowing you to modify it before any containers use it.
I run the mythic-cli status to generate the .env file.
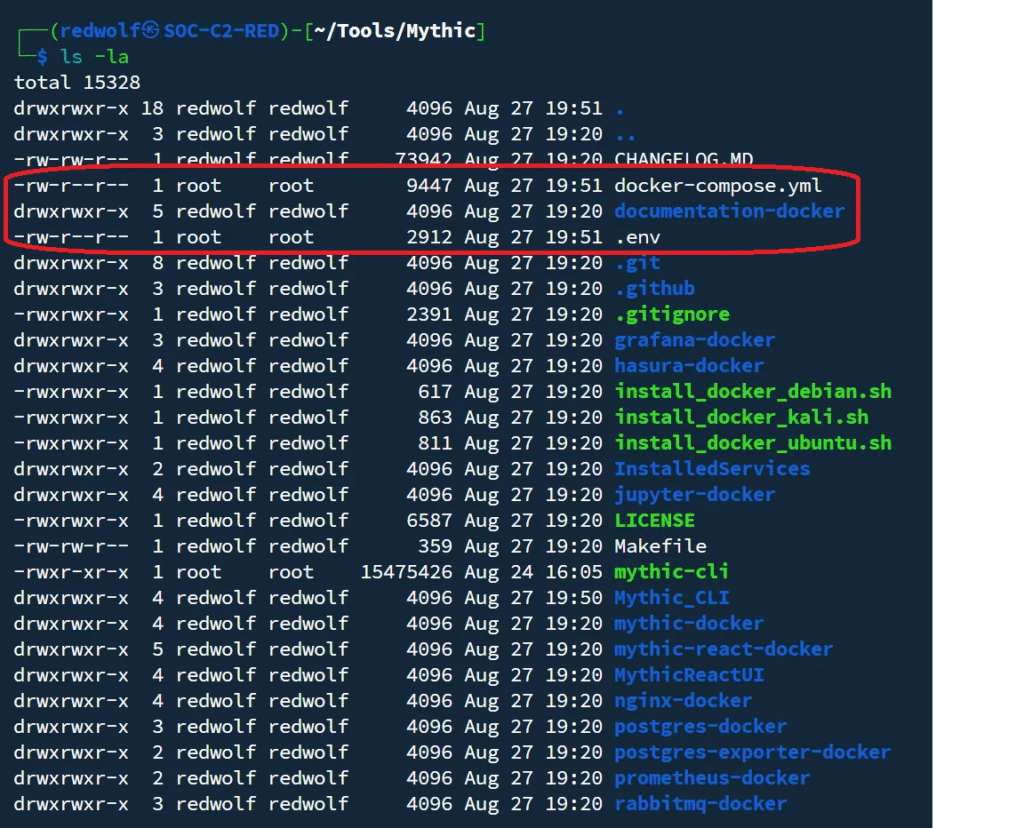
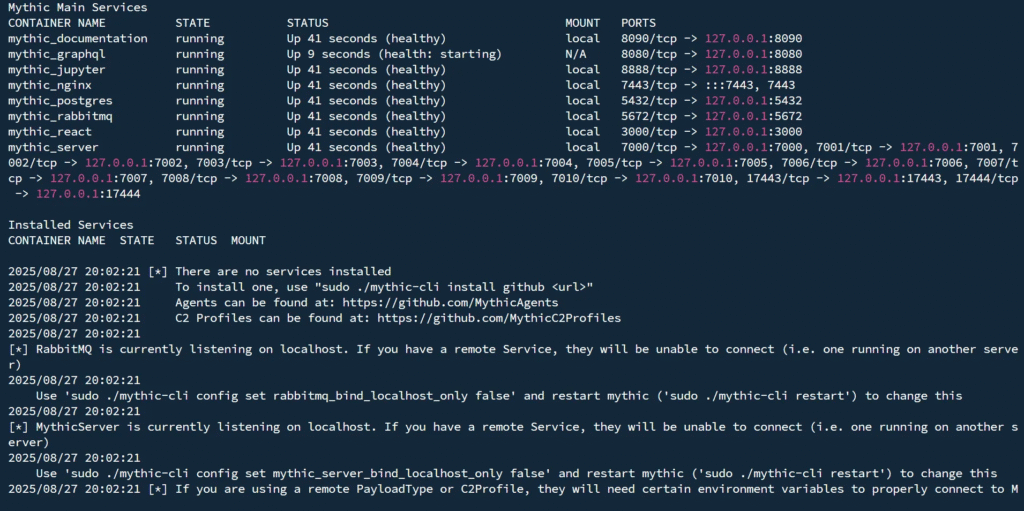
sudo ./mythic-cli statusThe docker-compose.yml and .env files are created along with other files.
When you run sudo ./mythic-cli status for the first time, Mythic will generate default values. Be sure to note down the passwords created inside the .env file. The MYTHIC_ADMIN credentials are required later to log in to the Web GUI.
Now run the command sudo ./mythic-cli start to start the installation.
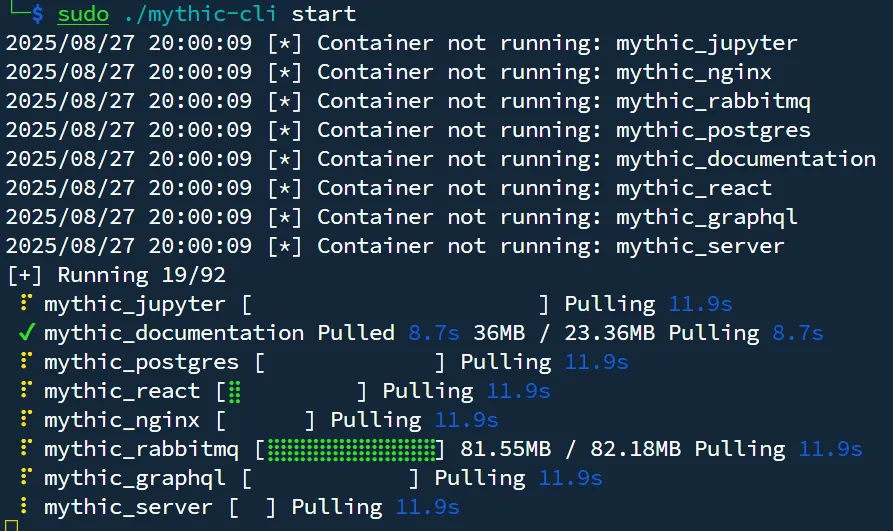
Please wait for the installation to complete. Some components may take a little longer to start, and you might see a few error messages — don’t worry, this is normal. Continue waiting until you see an output similar to the one shown below.
Verify Mythic Status
You can check the current status of Mythic with: sudo ./mythic-cli status.
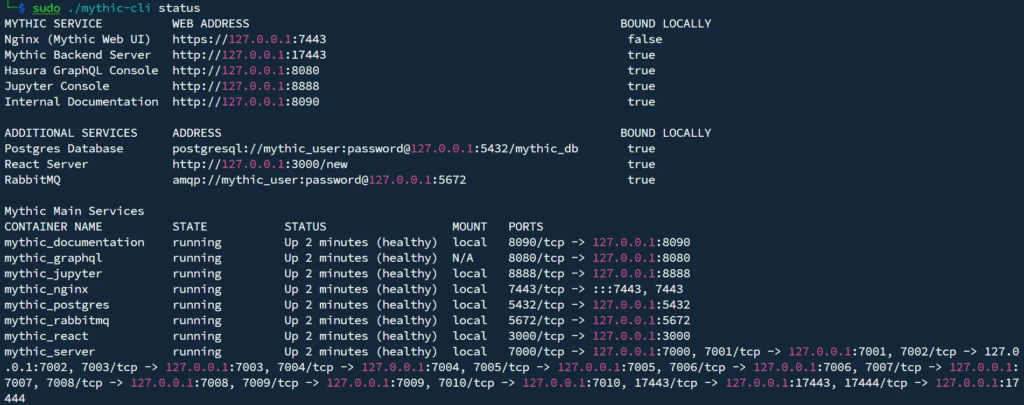
This will show which containers are running and confirm whether Mythic is operational.
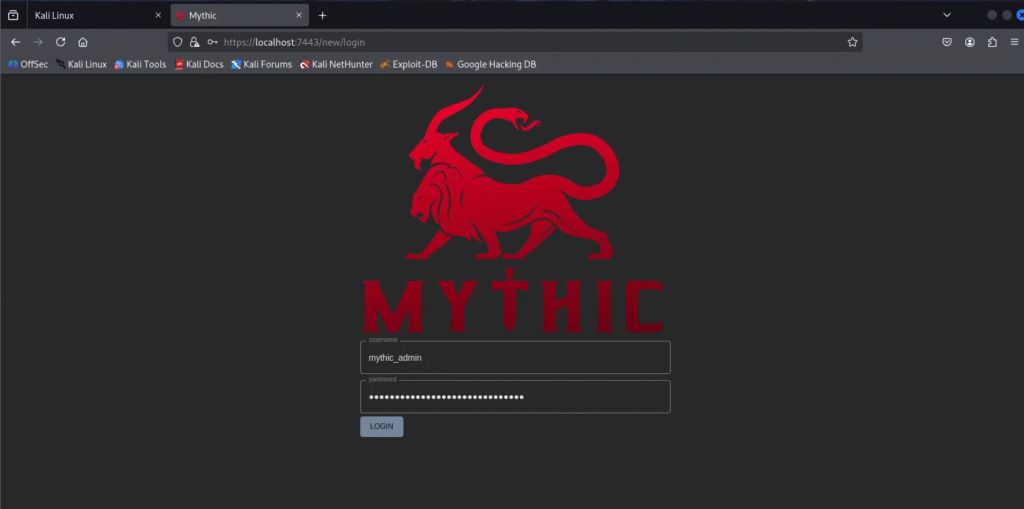
Access the Web GUI
The Web GUI is accessible using the URL https://localhost:7443.
https://localhost:7443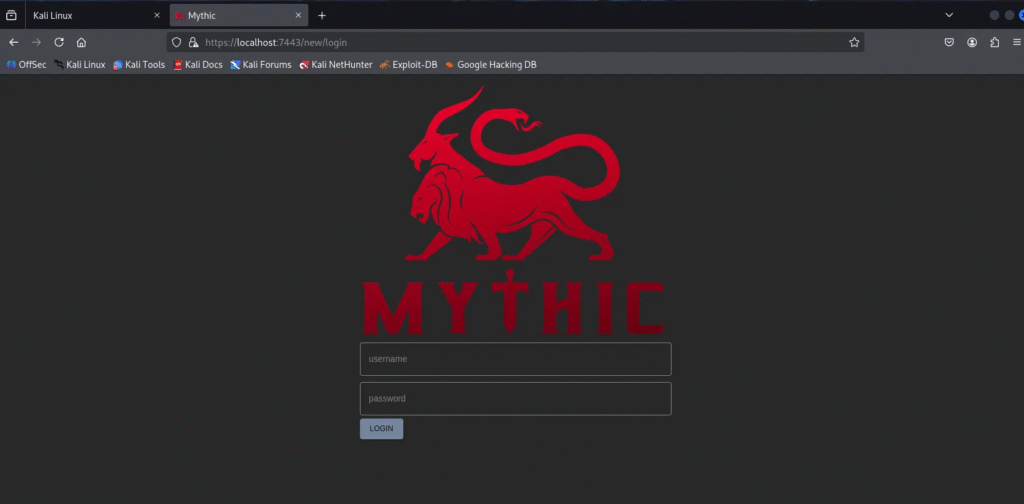
Log in using the credentials stored in the .env file.
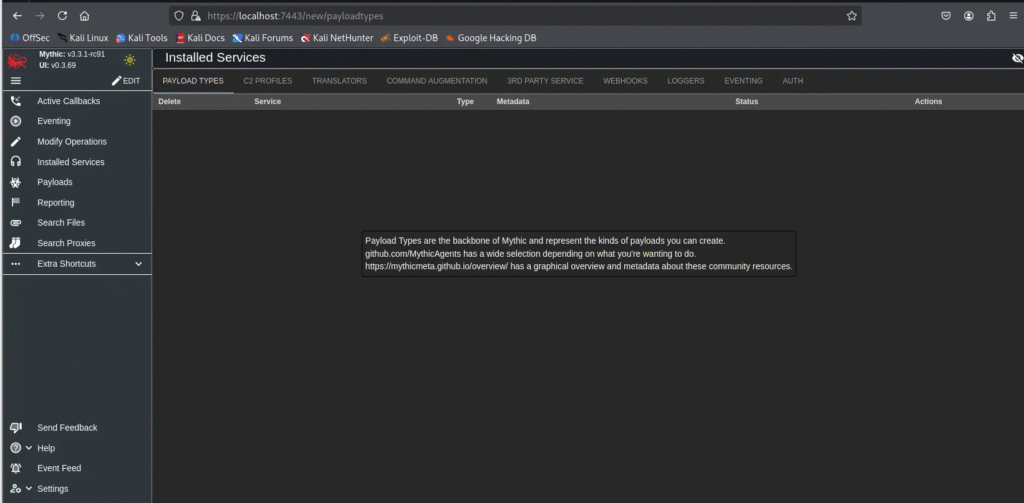
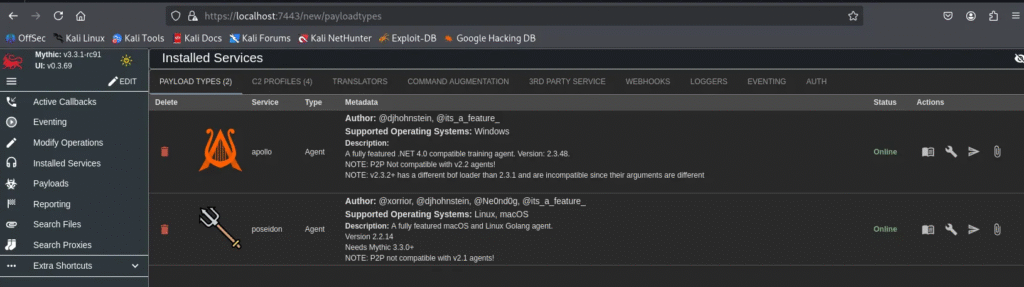
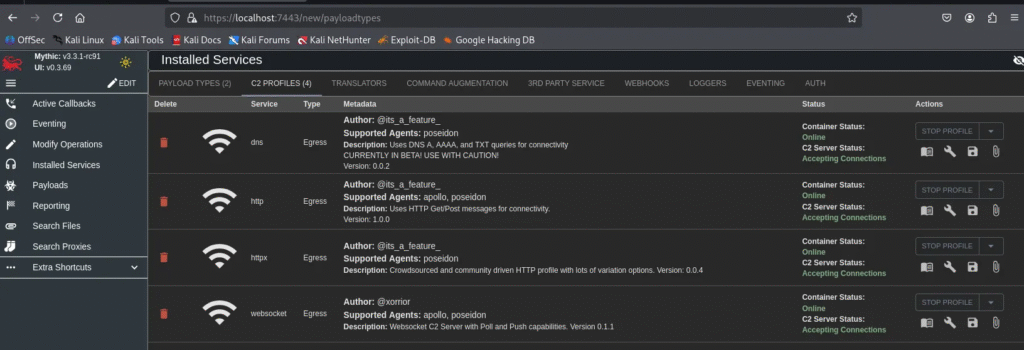
Installing Payload Types and C2 Profiles
By default, Mythic does not include any Payload Types (agents) or C2 Profiles. The payloads/agents and C2 profiles are provided as separate Dockers and We need to install them separately.
This is intentional for two main reasons:
- Disk space & resources: Each Payload Type and C2 Profile runs in its own Docker container. If bundled together, they would consume significant storage and resources.
- Ease of updates: Keeping them as separate repositories makes updates and maintenance much simpler.
You can browse the available components here:
Mythic Agents (Payload Types): https://github.com/MythicAgents
Mythic C2 Profiles: https://github.com/MythicC2Profiles
Install a Payload Type or C2 Profile
To install a Payload Type or C2 Profile, use the mythic-cli tool. For example:
sudo ./mythic-cli install github https://github.com/MythicAgents/<AgentName>or
sudo ./mythic-cli install github https://github.com/MythicC2Profiles/<ProfileName>Replace <AgentName> or <ProfileName> with the actual repository name you want to install.
Installing the Apollo agent for Windows:
sudo ./mythic-cli install github https://github.com/MythicAgents/Apollo.git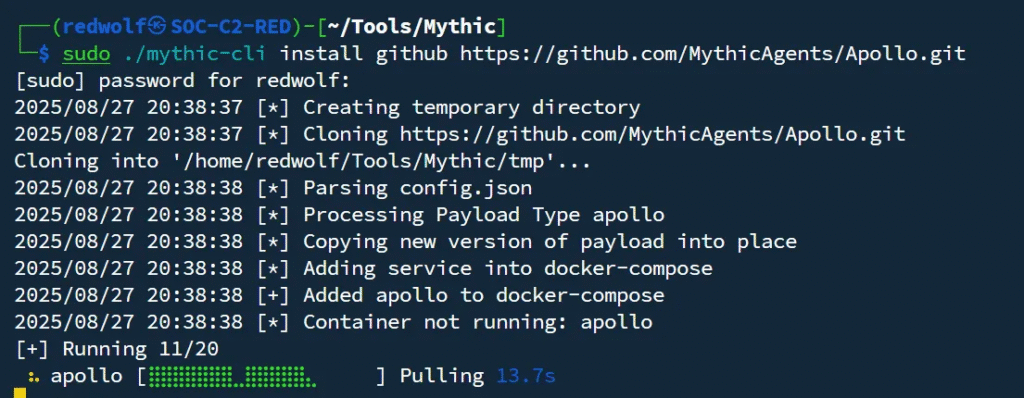
Installing the http C2 profile:
sudo ./mythic-cli install github https://github.com/MythicC2Profiles/http.git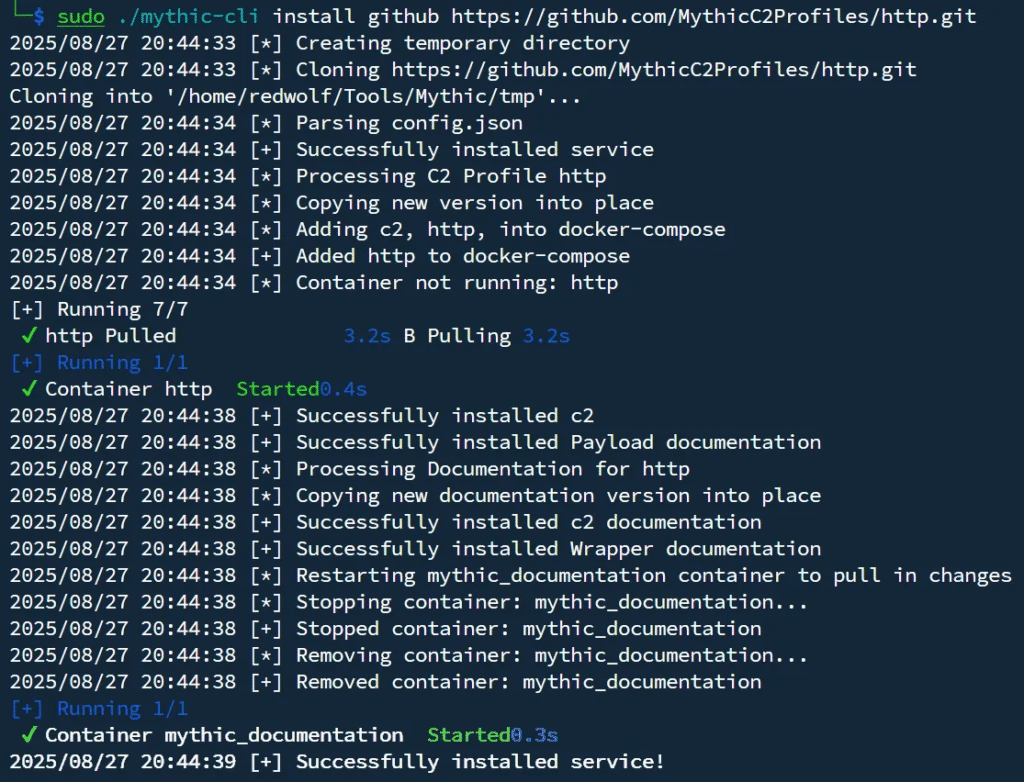
Restarting Mythic After Installation
After installing the required C2 Profiles and Payload Types, you’ll need to restart Mythic for the changes to take effect. Run the following command:
sudo ./mythic-cli restartThis will reload Mythic and bring up the newly installed agents and profiles in the Web GUI.
After restarting Mythic, the installed Payload Types and C2 Profiles will now appear in the Installed Services section of the Web GUI.
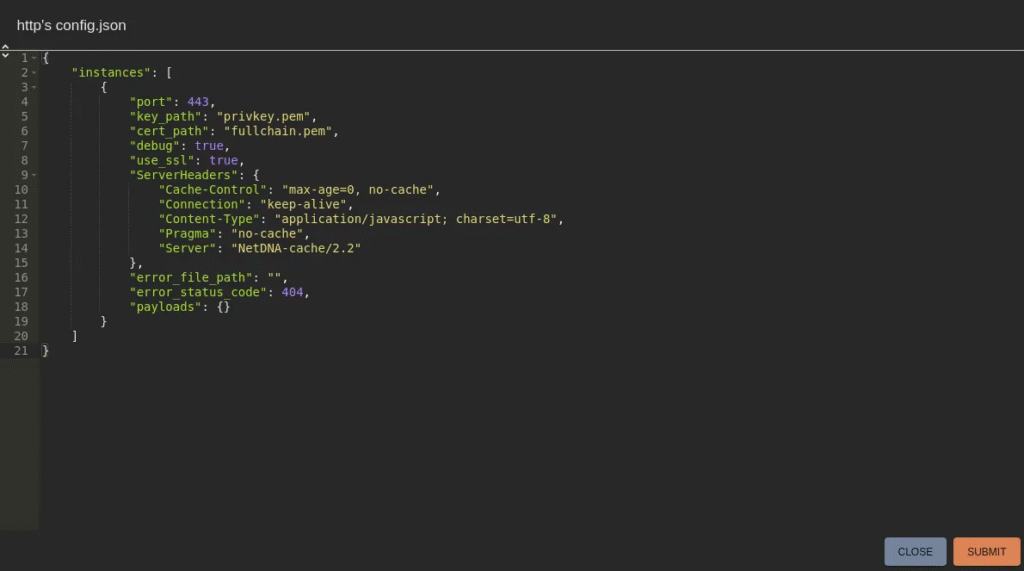
Important Note:
By default, the HTTP C2 profile is configured with port set to 80 and use_ssl set to false.
For secure communication, update the configuration before creating payloads:
- Set
use_ssl= true - Set
port= 443
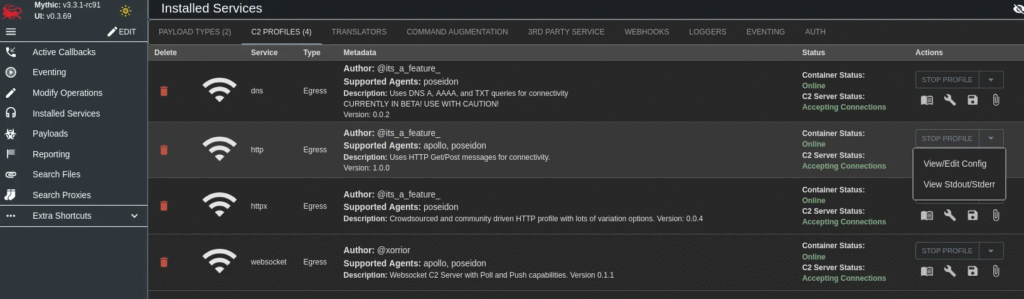

Change “use_ssl” to true and “port” to 443.
Create a New Payload
Go to Payloads → Create New Payload.
Select:
- OS Type:
Windows - Output format:
exe(Windows executable) - Provide a description (e.g., Apollo-HTTP-Win2022).
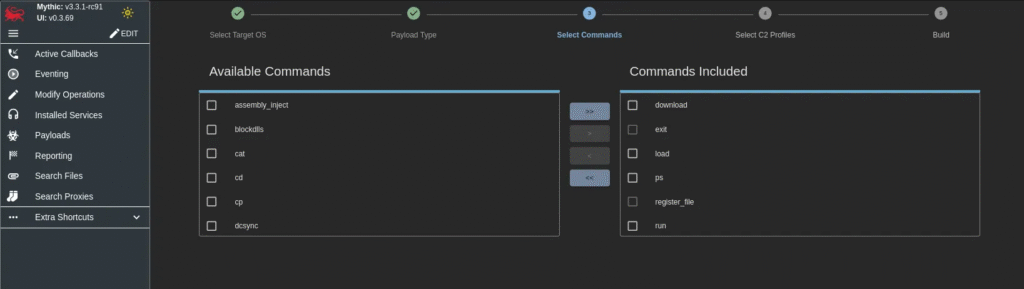
Select Commands.
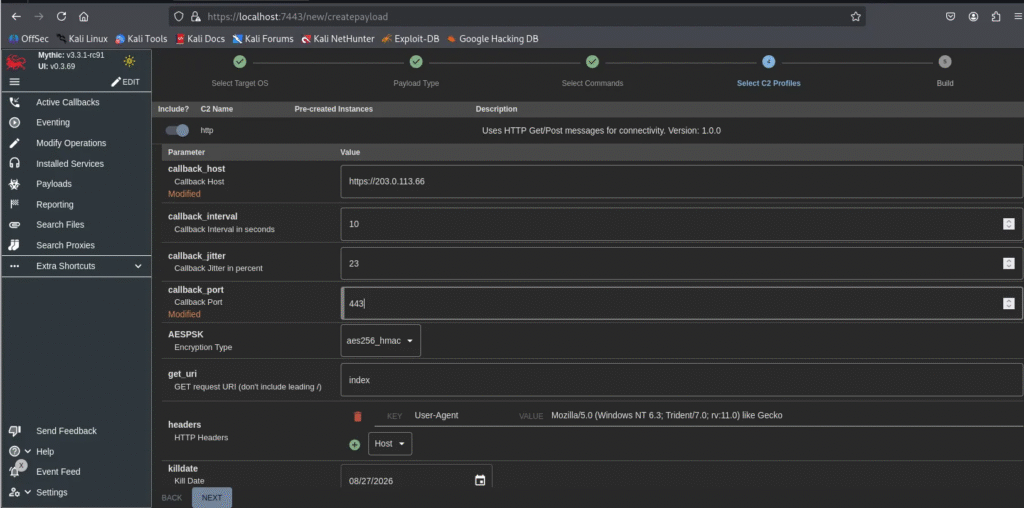
Select C2 Profile: http
Click Build Payload.
- Wait until it compiles successfully.
- The
.exepayload will be available for download.
Target OS Selection:

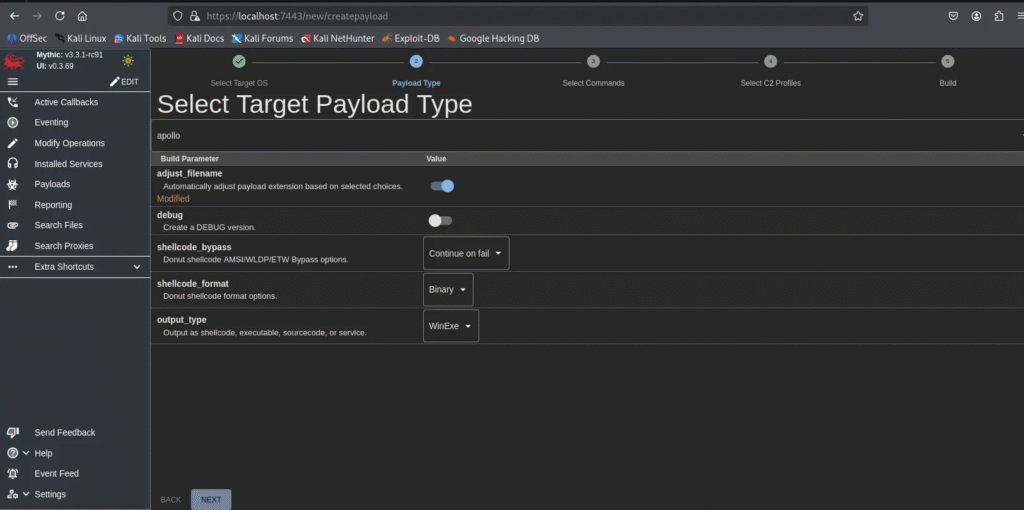
Target Payload Type:
Select Commands:
Select C2 Profiles:
Modify the callback_host and callback_port values to <your-Mythic-ip> and 443.
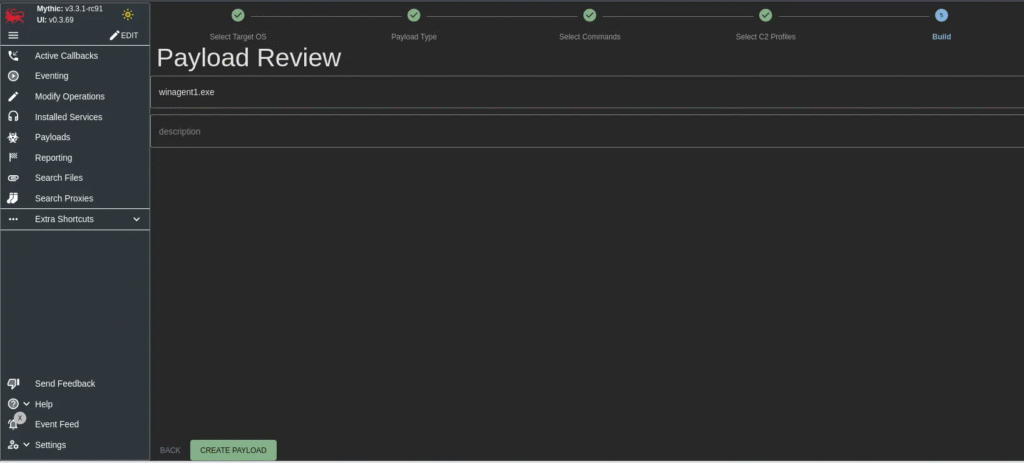
Build the payload:
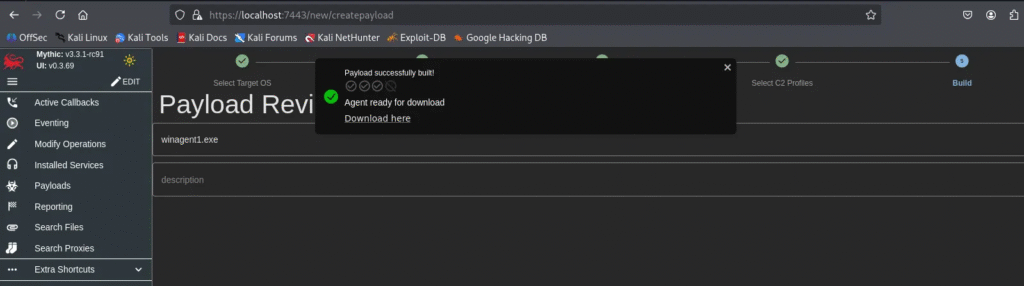
Rename the payload as you wish.
Build in progress:

Payload (agent) available for download.
Deploy the Payload on the Victim Machine
On the Victim Machine:
- Transfer the payload file (e.g., via file share, Phishing Website, USB passthrough, or SCP from your host).
- Run the payload executable (
winagent1.exe).
I have started a simple Python server to host the created Payload/Agent.
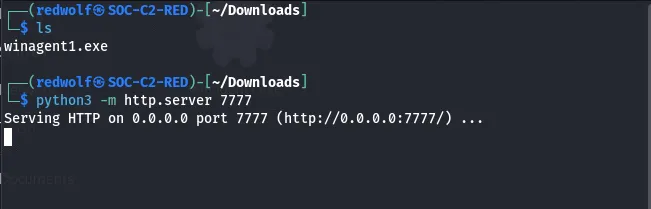

Download and execute the agent.
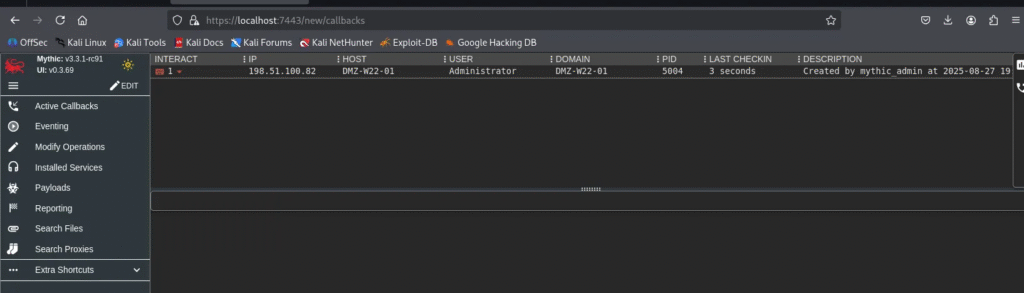
👉 Within a few seconds, you should see a new callback appear in the Mythic Web GUI under Callbacks.
Interacting with the Victim
Once the callback from your Windows victim appears in the Mythic GUI, you can begin interacting with it.
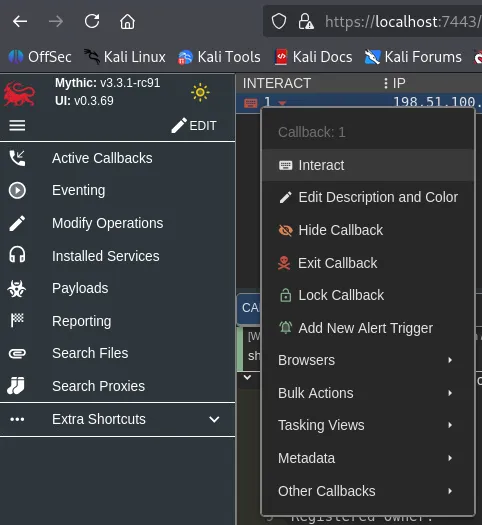
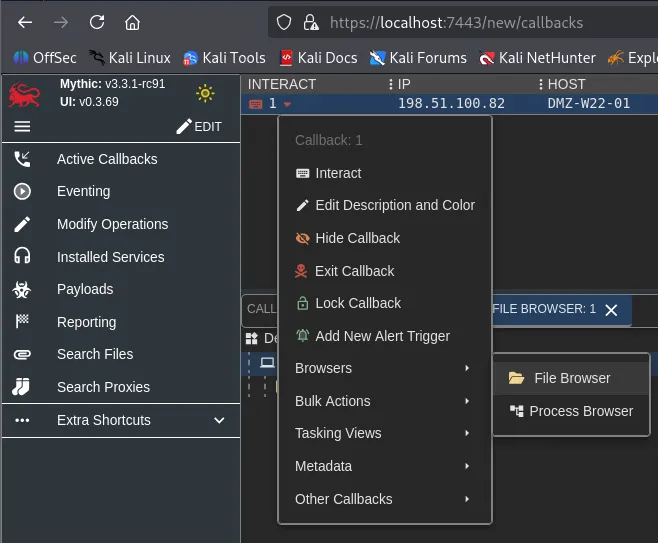
Callback Options
Click on the callback entry, and you’ll see several options for interacting with the target:
- Interact – Run commands supported by the installed Mythic agent.
- File Browser – Remotely browse and manage files on the victim system.
- Upload – Transfer files or additional payloads to the victim.
- Download (Exfiltration) – Retrieve files from the victim machine to your C2 server.
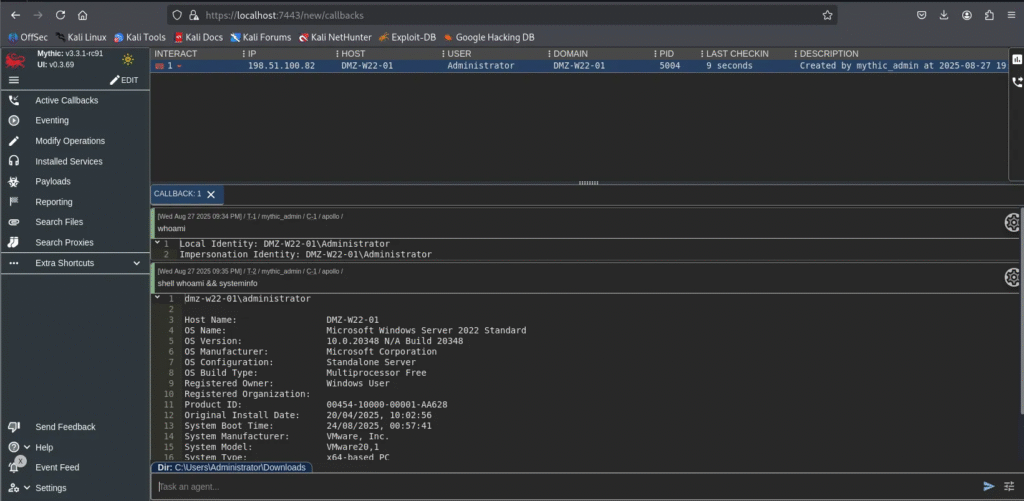
1. Execute Commands with Interact
Use the Interact option to enumerate and execute commands on the victim machine.
📸 Example screenshots:
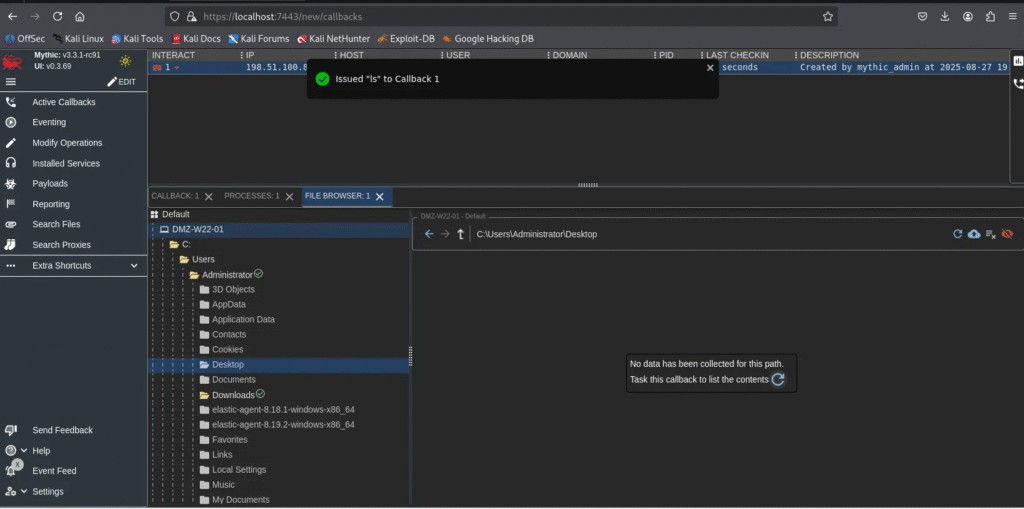
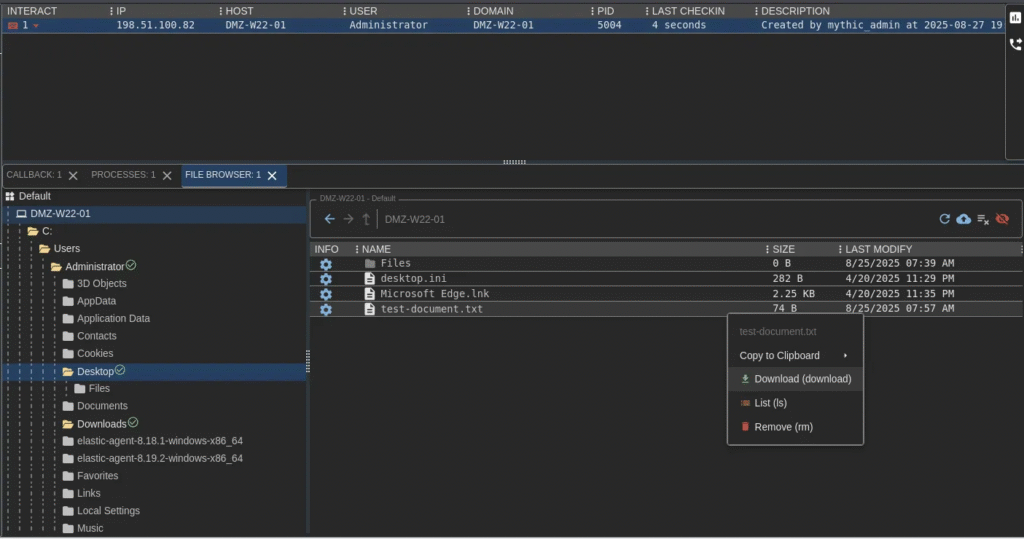
2. Browse Victim Files
The File Browser allows you to explore directories and files remotely.
📸 Example screenshots:

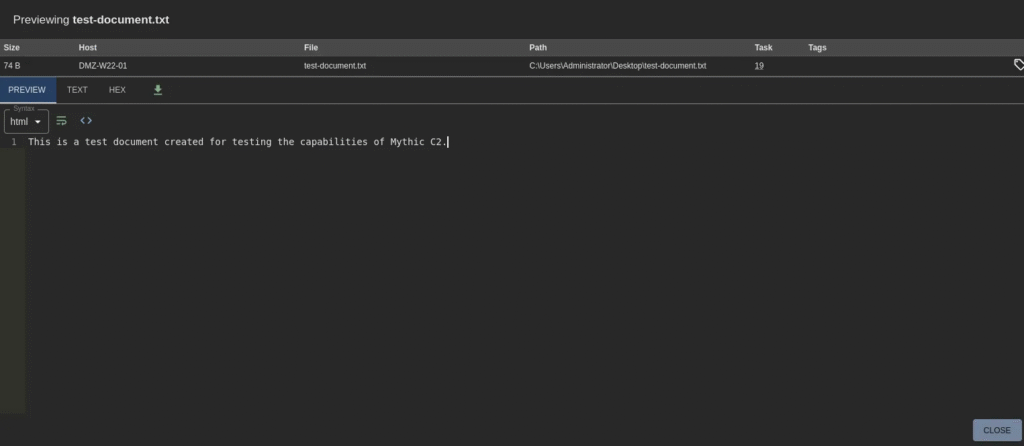
3. Exfiltrate Data (Download Files)
For this demo, a test file named test-document.txt was created on the victim machine. We’ll download (exfiltrate) it to the C2 host.
📸 Example screenshots:
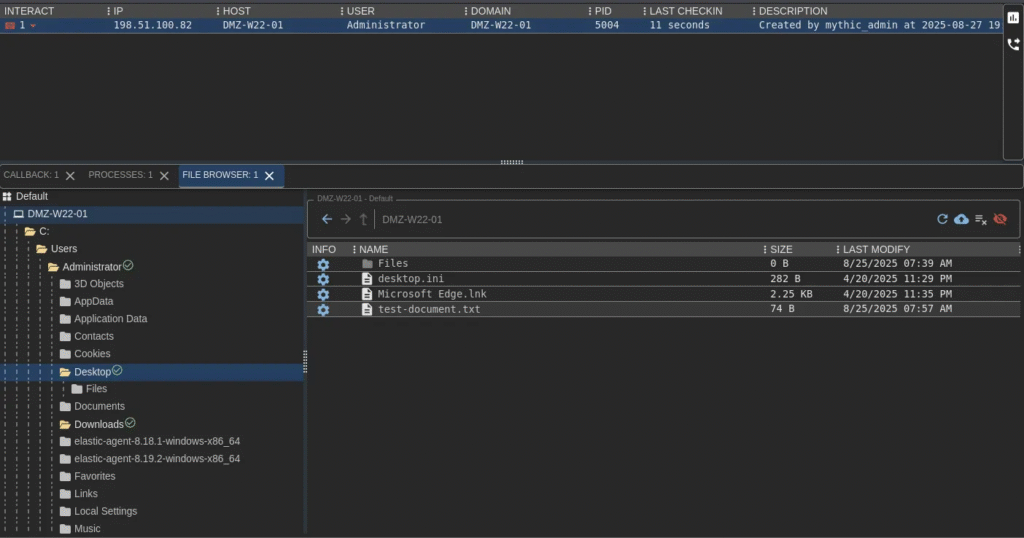
✅Document successfully exfiltrated:

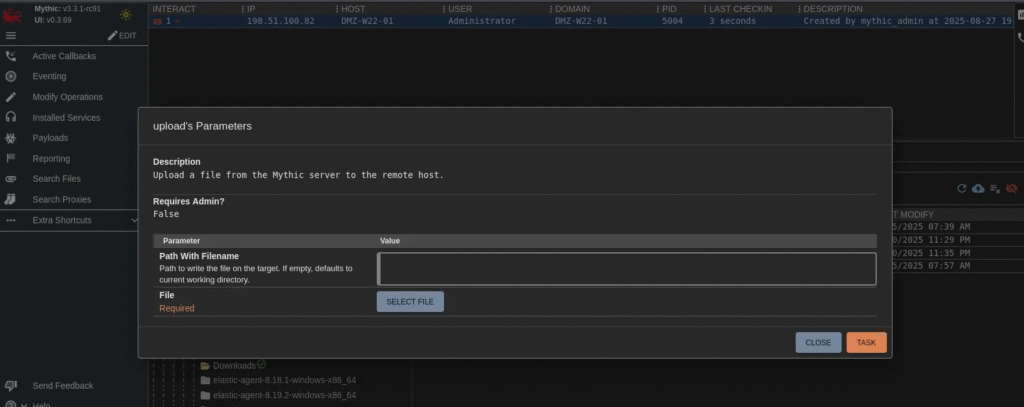
4. Upload Files/Payloads
You can also use the Upload option to send additional payloads or software to the victim machine for further operations.
🏁Conclusion
In this walkthrough, we explored the installation, configuration, and practical use of Mythic C2 within a controlled lab environment. Starting from the initial setup, we moved through installing Payload Types and C2 Profiles, generating a Windows payload, deploying it on a Windows Server 2022 machine, and finally demonstrating core capabilities such as command execution, file browsing, data exfiltration, and file uploads.
What makes Mythic stand out is its modular, plug-and-play architecture. Operators can easily add new agents, communication channels, or profiles as needed, while the web-based interface and containerized backend provide both scalability and flexibility. These features not only streamline red team operations but also enhance maintainability and data analytics across engagements.
⚠️ Important Reminder: Everything demonstrated here was performed in a safe, isolated lab environment. Tools like Mythic should only be used in authorized penetration testing or red teaming scenarios. Unauthorized use is illegal and unethical.
With the basics now in place, the next steps involve exploring advanced capabilities such as custom payload development, multi-stage operations, and integrating Mythic with other tools in your red team toolkit. This ensures you can get the most out of this powerful framework while staying aligned with professional and ethical practices.